Thursday, June 19, 2014

Egg Drop Soup


One of my favorite things to get at Chinese restaurants is egg drop soup. I have always wondered how the soup was made but never knew how until recently. It actually turned out to be pretty easy!

To make 2 bowls of soup you will need:
  • 2 cups CHICKEN BROTH
  • 1/2 tablespoon CORNSTARCH
  • EGGS
  • GREEN ONION, chopped
  • SALT & PEPPER to taste
  • Optional: a few drops of SESAME OIL


Whisk the chicken broth and corn starch together in a small pot. (Make sure that the chicken broth is either cool or at room temperature for this step. If the broth is hot the cornstarch will clump!) Then start heating the mixture on the stove.


Whisk your eggs in a small bowl like you are making scrambled eggs. 


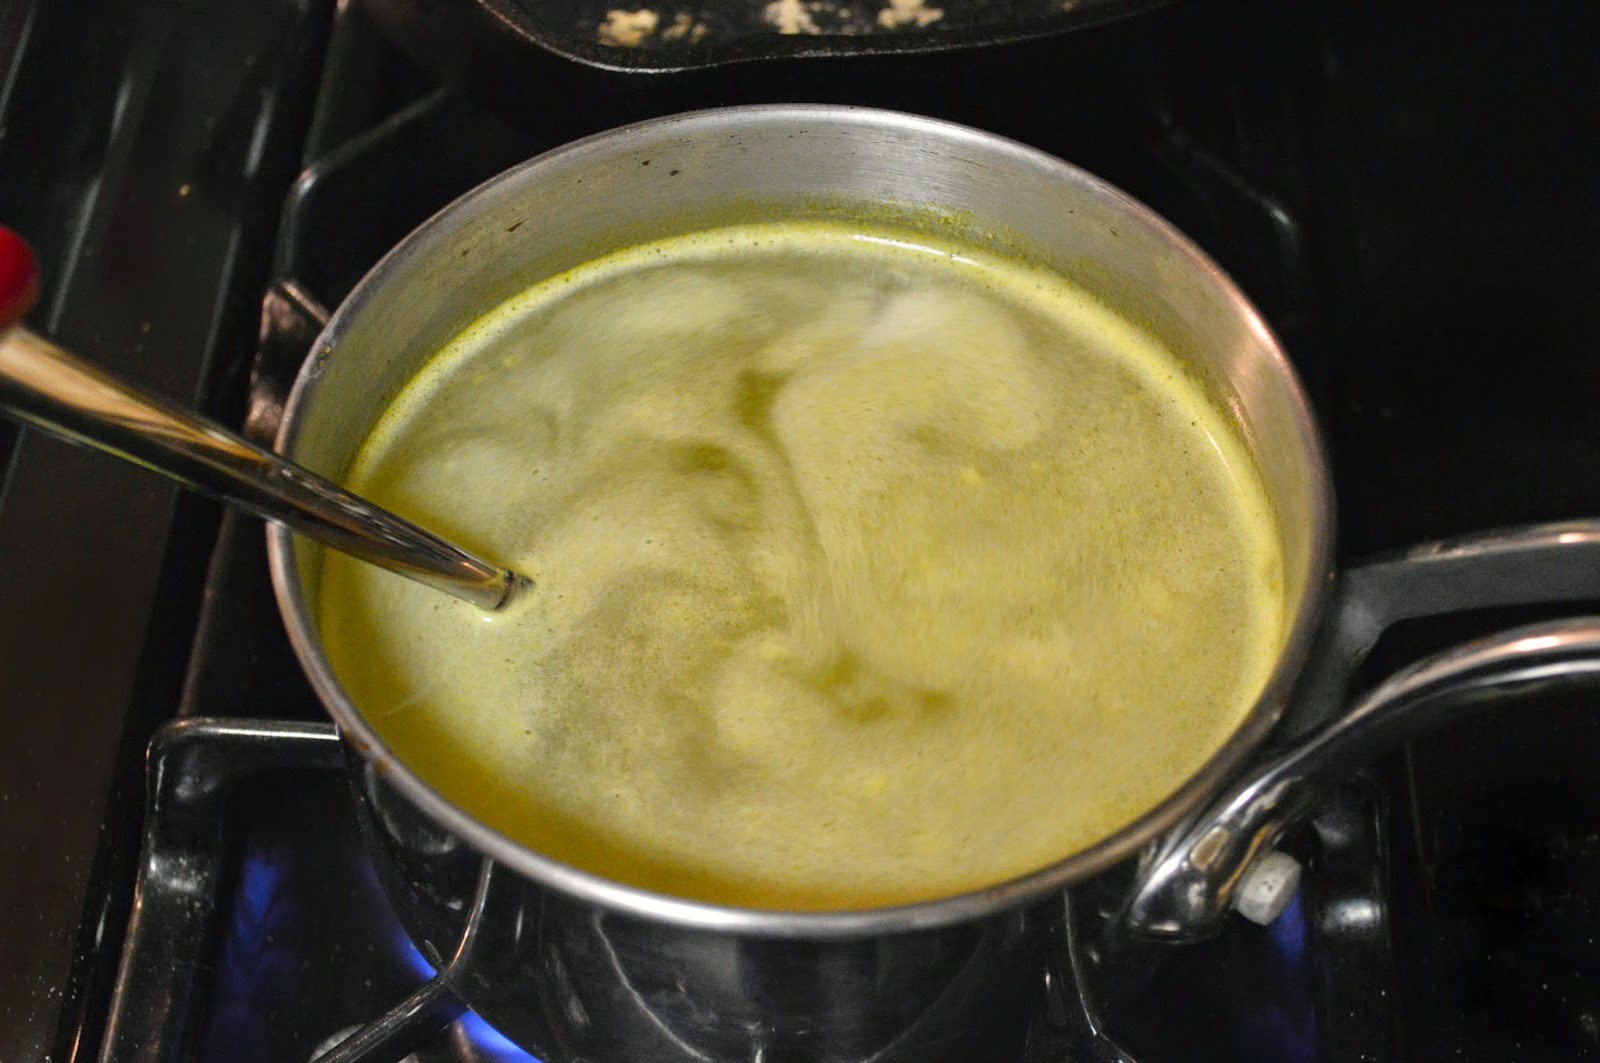
Once the chicken broth reaches a boil, use a spoon to stir the broth so that you get a vortex. Slowly drizzle the egg into the broth while continuing to stir the broth with your other hand. (If you aren't very coordinated, you may want to recruit a friend to help with this step.) The egg will cook immediately and should look like thin wisps in the broth.


Once all of the egg has been added, stir in the salt, pepper, and sesame oil. Sprinkle the chopped green onions on top and enjoy!


Egg Drop Soup

Ingredients:
To make 2 bowls of soup you will need:
  • 2 cups CHICKEN BROTH
  • 1/2 tablespoon CORNSTARCH
  • EGGS
  • GREEN ONION
  • SALT & PEPPER to taste
  • Optional: a few drops of SESAME OIL

    Directions:
    1. Whisk the chicken broth and corn starch together in a small pot. (Make sure that the chicken broth is either cool or at room temperature for this step. If the broth is hot the cornstarch will clump!) Then start heating the mixture on the stove
    2. Whisk your eggs in a small bowl like you are making scrambled eggs. 
    3. Once the chicken broth reaches a boil, use a spoon to stir the broth so that you get a vortex. Slowly drizzle the egg into the broth while continuing to stir the broth with your other hand. (If you aren't very coordinated, you may want to recruit a friend to help with this step.) The egg will cook immediately and should look like thin wisps in the broth. 
    4. Once all of the egg has been added, stir in the salt, pepper, and sesame oil. Sprinkle the chopped green onions on top and enjoy!


      Sugar Flowers


      Roses


      Daises  


      Carnations 


      Orchid


      Thursday, May 29, 2014

      Cilantro Lime Cauliflower Rice


      This recipe is a great way to cut a few carbs out of your diet. Simply substitute riced cauliflower for regular white rice in your favorite dishes. I like to serve this cilantro lime cauliflower rice with black beans, chicken, shredded cheese, and salsa. Imagine a Chipotle burrito bowl but with riced cauliflower instead of white rice! 

      To make this cilantro lime cauliflower rice you will need:
      • 1 head of CAULIFLOWER
      • 1-2 Tbs COCONUT OIL (you could substitute vegetable or canola oil)
      • 1/2 ONION, diced
      • 2 cloves of GARLIC, minced
      • 1/2 cup CILANTRO, chopped
      • 3 Tbs LIME JUICE
      • SALT to taste
      • PEPPER to taste

      Grate the cauliflower using either a cheese grater or a food processor (if using a food process pulse the cauliflower in batches until the desired texture is reached). 


      The grated cauliflower should look something like the picture below! The pieces should be about the same size as a grain of rice.


      Heat the oil in a skillet over med-high heat and then add the onion and garlic.


      When the onion starts to turn translucent add the riced cauliflower. Cook the cauliflower stirring occasionally for 5-7 minutes.


      Once the cauliflower is cooked through, stir in the chopped cilantro and lime juice!


      Add salt and pepper to taste and then dig in!


      Cilantro Lime Cauliflower Rice

      Ingredients:
      • 1 head of CAULIFLOWER
      • 1-2 Tbs COCONUT OIL (could substitute vegetable or canola oil)
      • 1/2 ONION, diced
      • 2 cloves of GARLIC, minced
      • 1/2 cup CILANTRO, chopped
      • 3 Tbs LIME JUICE
      • SALT to taste
      • PEPPER to taste
          Directions:
          1. Grate the cauliflower using either a cheese grater or a food processor (if using a food process pulse the cauliflower in batches until the desired texture is reached). 
            • The pieces should be about the same size as a grain of rice.
          2. Heat the oil in a skillet over med-high heat and then add the onion and garlic.
          3. When the onion starts to turn translucent add the riced cauliflower. Cook the cauliflower stirring occasionally for 5-7 minutes.
          4. Once the cauliflower is cooked through, stir in the chopped cilantro and lime juice! Add salt and pepper to taste and then dig in!


              I based this dish on the following recipe: http://popularpaleo.com/2013/01/07/cilantro-lime-cauliflower-rice/

              Thursday, May 22, 2014

              Baked Vegetable Chips


              I love this recipe because it allows me to eat chips without feeling quite so guilty. You can take just about any root vegetable, slice it thin, and then bake it until it's crispy! 

              Pick one or more of the following:
              • BEET
              • BUTTERNUT SQUASH (my second favorite!)
              • KALE
              • PARSNIP
              • POTATO
              • SWEET POTATO (my favorite!)
              You will also need:
              • OLIVE OIL
              • SALT

              Start off by peeling your vegetables. Then, use a mandolin or a sharp knife to cut your vegetable of choice into 1/8th to 1/16th inch thick slices (or as thin as you can get them). 

              Next, soak the slices in a bowl of water for about an hour. This will help the chips crisp up by removing some of the excess starch. 

              Sweet Potato

              After an hour, drain the water...

              Beets & Butternut Squash

              ...and lay the slices out on a paper towel to dry. Sprinkle some salt onto the slices while they dry to help pull the water out. Pat dry with another paper towel. While the chips are drying, preheat your oven to 375 degrees F


              Once the chips are relatively dry place them onto a baking sheet and drizzle on some of the olive oil. Make sure that none of the chips are touching. (I sprinkled a little cinnamon on the sweet potato chips)

              Sweet Potato

              Bake for 15-20 minutes or until the chips are crispy. How thin you slice the chips will determine how long they will need to actually bake.

              Butternut Squash

              Once the chips are out of the oven, sprinkle with a little bit of salt or other spices and eat up!
                Butternut Squash & Parsnips

                These chips are best eaten fresh. You could prepare them ahead of time, but make sure not to bake them until the day you plan to eat them!


                Baked Vegetable Chips

                Ingredients:

                Pick one or more of the following:
                • BEET
                • BUTTERNUT SQUASH (my second favorite!)
                • KALE
                • PARSNIP
                • POTATO
                • SWEET POTATO (my favorite!)
                You will also need:
                • OLIVE OIL
                • SALT
                    Directions:
                    1. Start off by peeling your vegetables. 
                    2. Use a mandolin or a sharp knife to cut your vegetable of choice into 1/8th to 1/16th inch thick slices (or as thin as you can get them). 
                    3. Soak the slices in a bowl of water for about an hour. This will help the chips crisp up by removing some of the excess starch. 
                    4. After an hour, drain the water and lay the slices out on a paper towel to dry. Sprinkle some salt onto the slices while they dry to help pull the water out. Pat dry with another paper towel. While the chips are drying, preheat your oven to 375 degrees F
                    5. Once the chips are relatively dry place them onto a baking sheet and drizzle on some of the olive oil. Make sure that none of the chips are touching. 
                    6. Bake for 15-20 minutes or until the chips are crispy. How thin you slice the chips will determine how long they will need to actually bake. 
                    7. Once the chips are out of the oven, sprinkle with a little bit of salt or other spices and eat up! 
                      • Note: These chips are best eaten fresh. You could prepare them ahead of time, but make sure not to bake them until the day you plan to eat them!


                        Saturday, May 10, 2014

                        Sausage Gravy


                        Last weekend my husband and I had some friend over we and made breakfast for dinner! We made an egg casserole, bacon, and biscuits with sausage gravy. Now, I had never actually made sausage gravy before and I have to tell you, it was so simple! I didn't expect it to be difficult, but I had no idea just how simple it would be! 

                        To make enough gravy for 4-6 biscuits you will need:
                        • 1/2 lb. GROUND SAUSAGE
                        • 4 Tbs FLOUR
                        • 2 & 1/2 cups MILK
                        • 1/2 tsp SALT
                        • 1/2 tsp PEPPER

                        Start off by browning the sausage in a skillet on the stove


                        Once the sausage is cooked, sprinkle the flour over the top. Stir the flour into the sausage and allow the mixture to cook for another 3 minutes


                        Next, pour in the milk. 


                        Stir to combine and add the salt and pepper. (I ended up adding an extra 1/2 tsp of pepper.)


                        Allow the gravy to cook over a medium heat until it thickens, about 10 minutes. Be sure to stir the gravy frequently to keep it from burning on the bottom of the skillet. 

                        If you have trouble getting the gravy to thicken stir in a little bit more flour. If the gravy become too thick, just add a splash of milk!


                        Bake up some biscuits to serve it over...


                         ...and enjoy!


                        Perfection. 


                        Sausage Gravy

                        Ingredients:
                        • 1/2 lb. GROUND SAUSAGE
                        • 4 Tbs FLOUR
                        • 2 & 1/2 cups MILK
                        • 1/2 tsp SALT
                        • 1/2 tsp PEPPER
                            Directions:
                            1. Start off by browning the sausage in a skillet on the stove
                            2. Once the sausage is cooked, sprinkle the flour over the top. Stir the flour into the sausage and allow the mixture to cook for another 3 minutes
                            3. Next, pour in the milk. Stir to combine and add the salt and pepper. (I ended up adding an extra 1/2 tsp of pepper.)
                            4. Allow the gravy to cook over a medium heat until it thickens, about 10 minutes. Be sure to stir the gravy frequently to keep it from burning on the bottom of the skillet. 
                              • If you have trouble getting the gravy to thicken, stir in a little bit of extra flour. If the gravy become too thick, just add a splash of milk!
                            5. Bake up some biscuits to serve it over and enjoy!


                                Tuesday, May 6, 2014

                                Chili


                                This is my take on the chili I grew up eating. Honestly though, I forgot to buy a chili seasoning packet so I made up my own seasoning blend using the spices I had in my cabinet.... and it turned out pretty great! I will definitely make this again!

                                To make 4-6 servings of this hearty chili you will need:
                                • 1 lb GROUND BEEF
                                • 1 Tbs OLIVE OIL
                                • 1 ONION, chopped
                                • 2 Tbs GARLIC, minced
                                • 3 oz. TOMATO PASTE
                                • 1 (10 oz.) can of ROTEL
                                • 1 (15 oz.) can LIGHT KIDNEY BEANS, riced
                                • 4 cups (32 oz.) TOMATO JUICE
                                • 1 Tbs WORCESTERSHIRE SAUCE
                                • 1Tbs CHILI POWDER
                                • 1 tsp PAPRIKA
                                • 1 Tbs CUMIN
                                • 1/2 tsp CAYENNE
                                • 1/2 tsp GARLIC POWDER
                                • 1 tsp SALT
                                • 1/2 tsp PEPPER

                                Heat about a tablespoon of olive oil in a large pot. When the oil is hot, add the onion and garlic. Saute the onion and garlic until they start to turn translucent. Next, add the beef and cook it until it is no longer pink.


                                Then mix in the tomato paste and the can of Rotel.


                                Add the tomato juice, spices, and Worcestershire sauce next.


                                Lastly, add the beans! If you add them too early they will start to get mushy so make sure to add them at the end.


                                Once the chili is hot and all of the ingredients have been incorporated, serve it up! I like to top my chili with cheddar cheese, onion straws, and a little bit of sour cream. Yum!


                                Chili

                                Ingredients:
                                • 1 lb GROUND BEEF
                                • 1 Tbs OLIVE OIL
                                • ONION, chopped
                                • 2 Tbs GARLIC, minced
                                • 3 oz. TOMATO PASTE
                                • 1 (10 oz.) can of ROTEL
                                • 1 (15 oz.) can LIGHT KIDNEY BEANS, riced
                                • 4 cups (32 oz.) TOMATO JUICE
                                • 1 Tbs WORCESTERSHIRE SAUCE
                                • 1Tbs CHILI POWDER
                                • 1 tsp PAPRIKA
                                • 1 Tbs CUMIN
                                • 1/2 tsp CAYENNE
                                • 1/2 tsp GARLIC POWDER
                                • 1 tsp SALT
                                • 1/2 tsp PEPPER
                                    Directions:
                                    1. Heat about a tablespoon of olive oil in a large pot. When the oil is hot, add the onion and garlic. Saute the onion and garlic until they start to turn translucent. 
                                    2. Next, add the beef and cook it until it is no longer pink.
                                    3. Mix in the tomato paste and the can of Rotel.
                                    4. Add the tomato juice, spices, and Worcestershire sauce next.
                                    5. Lastly, add the beans! If you add them too early they will start to get mushy so make sure to add them at the end.
                                    6. Once the chili is hot and all of the ingredients have been incorporated, serve it up! I like to top my chili with cheddar cheese, onion straws, and a little bit of sour cream. Yum!


                                      Saturday, April 5, 2014

                                      Beef Enchiladas with Red Sauce

                                      As I established in my post for chicken enchiladas with a green chili and sour cream sauce, I LOVE enchiladas! These enchiladas are filled with ground beef, green chilies, cheddar cheese, black olives, and green onions. They are then wrapped in corn tortillas and rolled in a red enchilada sauce. There are so many great flavors all wrapped up into these little enchiladas! They are perfect for a Mexican fiesta!

                                      To make roughly 3 servings (about 10 enchiladas) you will need:
                                      • 8 oz. GROUND BEEF (I used 80/20, but feel free to use whatever your normally use!)
                                      • 1 small ONION, chopped
                                      • 1 (4 oz.) can GREEN CHILIES
                                      • about 10 CORN TORTILLAS
                                      • 1 & 1/2 cup CHEDDAR CHEESE, grated
                                      • 1 (2.25 oz.) can BLACK OLIVES, chopped
                                      • 4-6 GREEN ONIONS, chopped
                                      • 1/4 cup CILANTRO, chopped
                                      For the sauce you will need:
                                      • 1 & 1/2 tsp of CANOLA OIL
                                      • 1 & 1/2 tsp FLOUR
                                      • 1 (14 oz.) can of ENCHILADA SAUCE
                                      • 1 cup CHICKEN BROTH
                                      • 1/4 tsp SALT
                                      • 1/4 tsp PEPPER
                                      • 1 Tbs FRESH CILANTRO, chopped

                                      Preheat your oven to 350 degrees F. Whisk the oil and flour together in a medium sized saucepan. Then add the enchilada sauce, chicken broth, salt, pepper, and cilantro. Let the sauce simmer for about 20 minutes while you cook the beef.  


                                      Saute the onion in a skillet until they just begin to turn translucent, then add the ground beef. Cook the beef until done and then stir in the green chilies. 


                                      Heat up either a skillet or a large griddle and spray on a little cooking spray. Cook the corn tortillas for about 2 minutes on each side in order to make them easier to fill. (Doing this will prevent some of the cracking that usually happens when you try to roll corn tortillas.)


                                      Once the sauce is done simmering, pour a little bit into the bottom of your baking dish so that it just coats the bottom. (I used a 10 x 10 inch pan, but you could use a 9 x 13 inch pan)


                                      Now it's time to build the enchiladas! Once the tortillas have been cooked on each side, dip them into the red sauce. Make sure that the whole tortilla is coated! Then  layer on the beef mixture, cheese, black olives, green onions, and cilantro!


                                      Next, roll up the tortilla and lay it in the baking pan seam side down! You may need to use a toothpick to keep it from unrolling until you get a few enchiladas into the pan.


                                      Repeat this process until you either use up all of the beef mixture or fill you pan!


                                      Pour the extra sauce over the top of the enchiladas...


                                      ...and top with any extra cheese, green onions, or black olives you have left!


                                      Bake the enchiladas for 20 minutes or until the sauce is bubbly!


                                      Top with any extra cilantro and then serve it up!


                                      Beef Enchiladas with Red Sauce

                                      Ingredients:

                                      To make roughly 3 servings (about 10 enchiladas) you will need:
                                      • 8 oz. GROUND BEEF (I used 80/20, but feel free to use whatever your normally use!)
                                      • 1 small ONION, chopped
                                      • 1 (4 oz.) can GREEN CHILIES
                                      • about 10 CORN TORTILLAS
                                      • 1 & 1/2 cup CHEDDAR CHEESE, grated
                                      • 1 (2.25 oz.) can BLACK OLIVES, chopped
                                      • 4-6 GREEN ONIONS, chopped
                                      • 1/4 cup CILANTRO, chopped
                                      For the sauce you will need:
                                      • 1 & 1/2 tsp of CANOLA OIL
                                      • 1 & 1/2 tsp FLOUR
                                      • 1 (14 oz.) can of ENCHILADA SAUCE
                                      • 1 cup CHICKEN BROTH
                                      • 1/4 tsp SALT
                                      • 1/4 tsp PEPPER
                                      • 1 Tbs FRESH CILANTRO, chopped

                                        Directions:
                                        1. Preheat your oven to 350 degrees F. 
                                        2. Whisk the oil and flour together in a medium sized saucepan. Then add the enchilada sauce, chicken broth, salt, pepper, and cilantro. Let the sauce simmer for about 20 minutes while you cook the beef.  
                                        3. Saute the onion in a skillet until they just begin to turn translucent, then add the ground beef. Cook the beef until done and then stir in the green chilies. 
                                        4. Heat up either a skillet or a large griddle and spray on a little cooking spray. Cook the corn tortillas for about 2 minutes on each side in order to make them easier to fill.
                                          • Doing this will prevent some of the cracking that usually happens when you try to roll corn tortillas.
                                        5. Once the sauce is done simmering, pour a little bit into the bottom of your baking dish so that it just coats the bottom. 
                                          • I used a 10 x 10 inch pan, but you could use a 9 x 13 inch pan.
                                        6. Once the tortillas have been cooked on each side, dip them into the red sauce. Make sure that the whole tortilla is coated! 
                                        7. Layer the beef mixture, cheese, black olives, green onions, and cilantro onto the coated tortilla.
                                        8. Next, roll up the tortilla and lay it seam side down in the baking pan! 
                                          • You may need to use a toothpick to keep it from unrolling until you get a few enchiladas into the pan.
                                        9. Repeat this process until you either use up all of the beef mixture or fill you pan!
                                        10. Pour the extra sauce over the top of the enchiladas and top with any extra cheese, green onions, or black olives you have left!
                                        11. Bake the enchiladas for 20 minutes or until the sauce is bubbly!
                                        12. Top with any extra cilantro and then serve it up!


                                          I adapted this recipe from the following blog: http://jamiecooksitup.net/2011/09/ground-beef-enchiladas/