Showing posts with label dessert. Show all posts

Saturday, August 16, 2014

Ina's "Perfect" Pie Crust


I have been on a quest to find a good pie crust for awhile now and this is the best one I have found so far! The crust is tender, flakey, and delicious! Thank you Ina Garten! 

To make one 10 inch pie crust or two smaller 6 inch pie crusts (like the pictures shown in this post) you will need:
  • 6 Tbs UNSALTED BUTTER
  • 1 & 1/2 cup FLOUR
  • 1 & 1/2 tsp SUGAR
  • 1/2 tsp SALT
  • 3 Tbs VEGETABLE SHORTENING
  • 1/4 cup ICE WATER

Before you start, make sure that your butter is very cold! I usually cut the butter into cubes and then pop it in into the freezer for a few hours (or overnight)!


Use a food processor and pulse together the flour, sugar, and salt. 


Add the cold butter and vegetable shortening to the food processor. Pulse another 6-8 times or until the contents start to look like course meal with pea sized butter chunks.


Start adding the ice water a little bit at a time, pulsing in between. (If you have a food processor you can slowly drizzle the water into the feed tube while pulsing.) When the mixture begins to clump together you have added enough water. Pinch the dough in between your fingers to see if it holds together. The 1/4 cup water specified in the recipe should do the trick, but if it is still crumbly and falls apart in your fingers add a little bit more. Be careful not to add too much water though or else the crust will be tough! 


Once the dough starts to clump together, dump the dough onto a clean and dry surface. Take the heel of your palm and press it down into the dough in order to 'shmoosh' the butter and flatten it into layers. Then carefully shape the dough into a disk. 

Look at all of the butter clumps! This will create an extra flaky crust!


Wrap the dough in cling wrap and refrigerate for at least an hour (up to 2 days).


Once the dough is chilled, unwrap the dough, and place it on a lightly floured surface. Then, roll the dough out into a 12 inch circle. The dough should be about 1/8 inch thick


Next, place the dough into a 9 inch pie plate. Carefully press the dough into the corners of the pan so that the dough lines the bottom and sides of the pan. (The picture below is a 6 inch pie plate.)


Then tuck the overhanging dough on the edges under itself and pinch with your fingers. Pour in your pie filling and bake at 400 degrees F for 45 to 50 minutes!


I made a strawberry pie, but you could use any filling you want!


Pie Crust
Ingredients:
  • 6 Tbs UNSALTED BUTTER
  • 1 & 1/2 cup FLOUR
  • 1 & 1/2 tsp SUGAR
  • 1/2 tsp SALT
  • 3 Tbs VEGETABLE SHORTENING
  • 1/4 cup ICE WATER
Directions:
  1. Before you start, make sure that your butter is very cold! I usually cut the butter into cubes and then pop it in into the freezer for a few hours (or overnight)!
  2. Use a food processor and pulse together the flour, sugar, and salt. 
  3. Add the cold butter and vegetable shortening to the food processor. Pulse another 6-8 times or until the contents start to look like course meal with pea sized butter chunks.
  4. Start adding the ice water a little bit at a time, pulsing in between. (If you have a food processor you can slowly drizzle the water into the feed tube while pulsing.) When the mixture begins to clump together you have added enough water. 
    • Pinch the dough in between your fingers to see if it holds together. The 1/4 cup water specified in the recipe should do the trick, but if it is still crumbly and falls apart in your fingers add a little bit more. Be careful not to add too much water though or else the crust will be tough! 
  5. Once the dough starts to clump together, dump the dough onto a clean and dry surface.
  6. Take the heel of your palm and press it down into the dough in order to 'shmoosh' the butter and flatten it into layers. This will create an extra flaky crust! Then carefully shape the dough into a disk.
  7. Wrap the dough in cling wrap and refrigerate for at least an hour (up to 2 days).
  8. Once the dough is chilled, unwrap the dough, and place it on a lightly floured surface. Then, roll the dough out into a 12 inch circle. The dough should be about 1/8 inch thick
  9. Next, place the dough into a 9 inch pie plate. Carefully press the dough into the corners of the pan so that the dough lines the bottom and sides of the pan. Then tuck the overhanging dough on the edges under itself and pinch with your fingers. 
  10. Pour in your pie filling and bake at 400 degrees F for 45 to 50 minutes!


    Wednesday, April 2, 2014

    Chocolate Zucchini Bread


    It is no secret that cakes and breads are not exactly "healthy." This is a problem because I love to bake and I especially love to eat what I bake! This chocolate zucchini bread is great because it is fluffy, moist, chocolaty, AND relatively healthy! There is absolutely no flour or sugar in this recipe but you would never know it by tasting the bread! I think it actually tastes more like a chocolate cake than a bread!

    To make this chocolate zucchini bread you will need:
    • 1 cup ALMOND BUTTER
    • 3 Tbs HONEY
    • 2 Tbs COCOA POWDER
    • 2 LARGE EGGS
    • 1/8 tsp SALT
    • 1 Tbs VANILLA
    • 1 tsp APPLE CIDER VINEGAR
    • 1/2 tsp BAKING SODA
    • 1 cup ZUCCHINI, shredded (squeeze as much of the excess water out as possible)
    • Optional: 1/3 cup NUTS (I used pecans)

    Start off by preheating your oven to 400 degrees F. Then put the almond butter, honey, cocoa powder, eggs, salt, and vanilla into a medium bowl. Use a handheld mixer to blend on a medium speed for 2 minutes.

    Add the vinegar and baking soda to the mixture and blend for another 30 seconds.


    Next, fold in the zucchini and the nuts with a spatula.


    It won't exactly look pretty... but I promise it tastes good!


    Pour the batter into a loaf pan that has been lined with parchment paper and sprayed with cooking spray.


    Bake the bread for 25-35 minutes depending on how much water you were able to get out of the zucchini.

    Note: I would recommend checking the bread with a toothpick every few minutes after the first 25 minutes until it comes out clean.


    You can serve it warm or at room temperature!


    I cut my bread into pieces that were 3/4 to 1 inch thick which gave me about 10 slices.


    Chocolate Zucchini Bread

    Ingredients:
    • 1 cup ALMOND BUTTER
    • 3 Tbs HONEY
    • 2 Tbs COCOA POWDER
    • LARGE EGGS
    • 1/8 tsp SALT
    • 1 Tbs VANILLA
    • 1 tsp APPLE CIDER VINEGAR
    • 1/2 tsp BAKING SODA
    • 1 cup ZUCCHINI, shredded (squeeze as much of the excess water out as possible)
    • Optional: 1/3 cup NUTS (I used pecans)
      Directions:
      1. Preheat your oven to 400 degrees F
      2. Put the almond butter, honey, cocoa powder, eggs, salt, and vanilla into a medium bowl. Use a handheld mixer to blend on a medium speed for 2 minutes.
      3. Add the vinegar and baking soda to the mixture and blend for another 30 seconds.
      4. Next, fold in the zucchini and the nuts with a spatula.
      5. Pour the batter into a loaf pan that has been lined with parchment paper and sprayed with cooking spray
      6. Bake the bread for 25-35 minutes depending on how much water you were able to get out of the zucchini. Note: I would recommend checking the bread with a toothpick every few minutes after the first 25 minutes until it comes out clean.


        I adapted this recipe from the following blog: http://wholelifestylenutrition.com/recipes/organic-chocolate-zucchini-bread-recipe/

        Tuesday, March 11, 2014

        Butterbeer Cupcakes


        A few months ago my husband and I started hosting a dinner and a movie night once a week. We have been working our way through the Harry Potter series and finally finished last weekend (I have mixed emotions anytime Harry Potter comes to an end). In honor of the movies I decided to try my hand at making some butterbeer cupcakes. I found this recipe on Pinterest and have been dying to try them!


        If you are like me and haven't been able to make your way down to The Wizarding World of Harry Potter yet you might wonder 'What does butterbeer even taste like???'. After doing some research, I found that most copycat butterbeer recipes contains some combination of melted butter (or imitation butter flavor), cream soda, butterscotch, and sometimes rum. In the case of these cupcake, the 'butterbeer' flavor comes mostly from butterscotch chips, imitation butter flavor, and a little bit of cream soda. Maybe next time I'll experiment and try to work in some rum...

        These cupcakes have a butterscotch cake (infused with cream soda and imitation butter flavor) that is filled with a butterscotch ganache, that is then topped with a butterscotch and butter flavored icing. Sound like a lot of flavor doesn't it?


        After making them, here are my thought on these cupcakes:
        • They are good but not great. Sorry to be a buzz-kill... (Although a few of our dinner guests loved them, so maybe it's just me...)
        • The ganache is delicous, but if you make it I would recommend starting off with less heavy cream than the recipe suggests (my ganach was a little too runny).
        • The icing was also delicious!
        • But the cake...it wasn't bad, but I think it could use some work. There was something about the texture of the cake that I didn't love, but it could possibly be fixed by leaving them in the oven a few minutes longer (The cupcakes were cooked through (a toothpick came out clean!), but they still just seemed almost under cooked in the middle somehow). They were also surprisingly lacking in flavor! In the end, it turned out to be ok because the ganache and icing had so much flavor and sweetness, that it balanced it out.

        If you would like to try these butterbeer cupcakes, here is the recipe I used: http://www.pastryaffair.com/blog/2011/7/14/butterbeer-cupcakes.html

        Happy baking!

         Here are some more pictures of my cupcakes, because I think they're cute!


        Friday, February 14, 2014

        Valentine's Sugar Cookies

        Here is one more Valentine's treat! Every year the collegiate chapter of Sigma Alpha Iota that I was initiated into has a bake sale for Valentine's Day. They usually have 2-3 bake sales a year and as a member I always got really excited when one started to get close because that meant I got to bake something! So this year, even though I have now graduated, I decided to make a special treat to send to the girls for the bake sale! I'll use any excuse I can find to bake something! ;)

        I decided to make some Valentine's sugar cookies so I could try out a new decorating technique and I think they turned out pretty well! I forgot to take pictures until the last minute so that is why most of the pictures are of the cookies already bagged and in the box!

        I think this one was my favorite! I didn't plan on making black (or I guess dark grey) and white flowers, but I started running out of pink so I gave it a try and I think they turned out beautifully!

        These were probably my second favorite, simple, yet pretty! I probably need to get some more practice with writing on cookies though... 

        Onto the box pictures! Haha. Here is the first layer of cookies that went into the box! So pretty! I will definitely make these again!

        ...and the second layer!

        ...and the top layer! 

        I hope you liked my cookies because I sure enjoyed making them!


        Thursday, February 13, 2014

        Red Velvet Cake Balls


        I made these red velvet cake balls last year for a Valentine's bake sale and they were a hit! They were cake-y and creamy on the inside and have a hard chocolate coating on the outside! They are positively delicious!

        To make 40-50 cake balls you will need:
        • 1 box RED VELVET CAKE MIX (prepared as directed on the box)
        • 1 can CREAM CHEESE ICING
        • ALMOND BARK (regular or white)

        NOTE: I think chocolate chips taste better than the chocolate almond bark, but the almond bark definitely sets up better than the chocolate chips. If you don't want to have to have to keep the cake balls refrigerated, then use the almond bark! (you can still refrigerate them if they are covered in almond bark though)

        Start off by baking the red velvet cake as directed on the box. (You could make the cake from scratch if you have a favorite recipe, but boxed cakes work just fine!) Once the cake has cooled, break it up with your hands in a large bowl.

        Once the cake is broken up enough that it is just a pile of crumbs, mix in the cream cheese icing (I usually use my hands, but does get messy!). When the cake and icing is well mixed together, roll the mixture out into 1 inch balls. You should end up with 40-50 balls.

        Depending on how much time you have, either refrigerate the balls overnight, or pop them in the freezer for a few hours. Having the balls chilled makes it so much easier to cover them in chocolate. Otherwise they tend to fall apart in the warm melted chocolate.

        Once the balls are chilled, melt a few squares of almond bark in a small bowl in the microwave. Then dip each ball into the almond bark to coat them. For a tip on covering the balls in chocolate CLICK HERE to see my post of Oreo balls! When they are coated, place the balls onto a piece of wax paper to set up.

        After all of the balls are coated in chocolate you can then decorate them by drizzling more almond bark over the top, rolling them in sprinkles, or anything else you can think of!


        The Valentine's Day bake sale spread! Doesn't it all look delicious?!


        Red Velvet Cake Balls

        Ingredients:
        • 1 box RED VELVET CAKE MIX (prepared as directed on the box)
        • 1 can CREAM CHEESE ICING
        • ALMOND BARK (regular or white)
        Directions:
        1. Start off by baking the red velvet cake as directed on the box. (You could make the cake from scratch if you have a favorite recipe, but boxed cakes work just fine!) Once the cake has cooled, break it up with your hands in a large bowl.
        2. Once the cake is broken up enough that it is just a pile of crumbs, mix in the cream cheese icing (I usually use my hands, but does get messy!). When the cake and icing is well mixed together, roll the mixture out into 1 inch balls. You should end up with 40-50 balls.
        3. Depending on how much time you have, either refrigerate the balls overnight, or pop them in the freezer for a few hours. Having the balls chilled makes it so much easier to cover them in chocolate. Otherwise they tend to fall apart in the warm melted chocolate.
        4. Once the balls are chilled, melt a few squares of almond bark in a small bowl in the microwave. Then dip each ball into the almond bark to coat them. For a tip on covering the balls in chocolate CLICK HERE to see my post of Oreo balls! When they are coated, place the balls onto a piece of wax paper to set up.
        5. After all of the balls are coated in chocolate you can then decorate them by drizzling more almond bark over the top, rolling them in sprinkles, or anything else you can think of!


          Sunday, January 19, 2014

          Oreo Balls


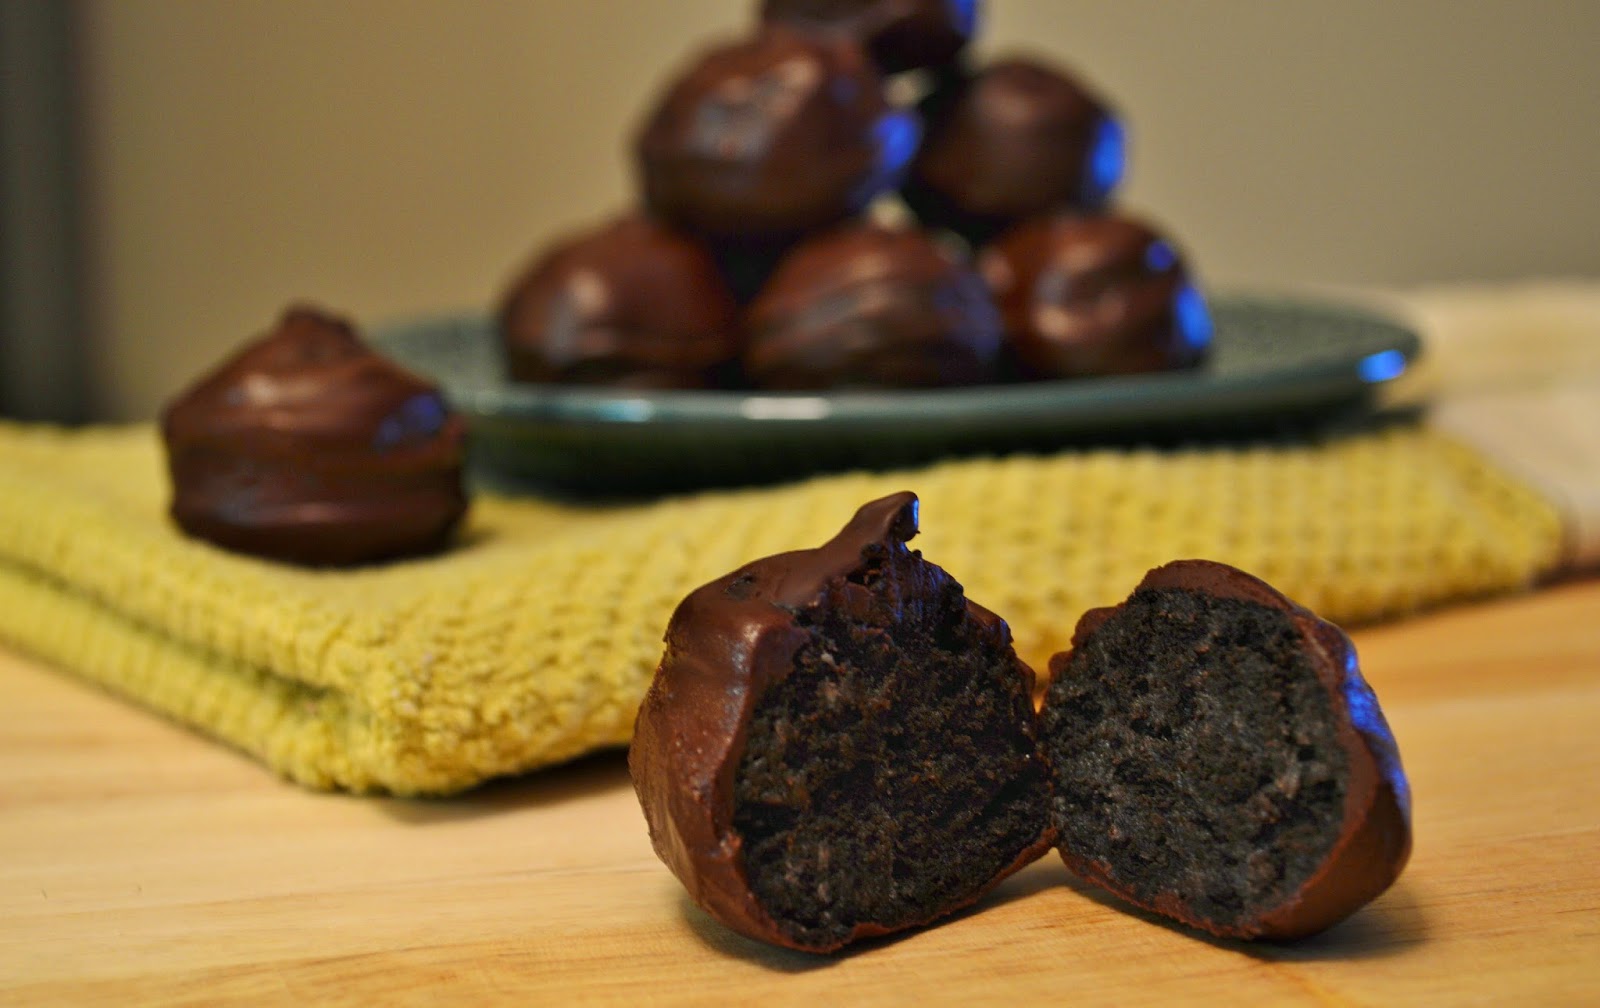
          It seems like everyone has heard of cake balls these days, but I don't think Oreo balls have gotten near as much hype. I don't understand this because I like Oreo balls more and they are just as easy to make! They are basically the same thing, except instead of breaking up a cake and mixing it with cream cheese icing, you crush up some Oreos and mix it with cream cheese. I think the Oreos provide for a better texture in the balls and aren't so "mushy." 

          To make 25-30 Oreo balls (depending on how big you make them) you will need:
          • 1 package OREOS (roughly 30 cookies)
          • 1 (8 oz.) package CREAM CHEESE, softened
          • 10-12 oz. of CHOCOLATE CHIPS or CHOCOLATE ALMOND BARK

          NOTE: I think chocolate chips taste better than the chocolate almond bark, but the almond bark definitely sets up better than the chocolate chips. If you don't want to have to have to keep the Oreo balls refrigerated, then use the almond bark!

          Start off by crushing up the Oreos. I tend to put the Oreos into a large baggie and hit them with the flat side of my meat tenderizer to accomplish this. You could also use a food processor, but I've had issues getting a consistent texture when I've tried that. 


          Aim for a texture like the Oreos in the picture below. Then add the cream cheese.


          Use your hands to mix the cream cheese into the crushed Oreos. You could use a spoon, but using your hands is so much easier!


          Then roll the mixture into 1 inch balls. At this point I would recommend freezing the ball for a few hours (or overnight). It makes it so much easier to cover them in chocolate! Otherwise they tend to fall apart in the warm melted chocolate.


          When you are ready to cover the balls, melt either the chocolate chips or chocolate almond bark in a small bowl.


          Then poke a toothpick into an Oreo ball and dip it in the chocolate. If you are worried about the balls looking perfect, you can poke the other end of the toothpick into an empty styrofoam egg carton while the chocolate hardens as seen in the picture below. You can thank my husband for that idea!


          That's it! Allow the chocolate to set up and then eat them!


          Yum!


          Oreo Balls

          Ingredients:
          • 1 package OREOS (roughly 30 cookies)
          • 1 (8 oz.) package CREAM CHEESE, softened
          • 10-12 oz. of CHOCOLATE CHIPS or CHOCOLATE ALMOND BARK

              Directions:
              1. Start off by crushing up the Oreos. I tend to put the Oreos into a large baggie and hit them with the flat side of my meat tenderizer to accomplish this. You could also use a food processor, but I've had issues getting a consistent texture when I've tried that. 
              2. Add the cream cheese to the crushed Oreos. Use your hands to mix the cream cheese into the Oreos. 
              3. Then roll the mixture into 1 inch balls. At this point I would recommend freezing the ball for a few hours (or overnight). It makes it so much easier to cover them in chocolate! 
              4. When you are ready to cover the balls, melt either the chocolate chips or chocolate almond bark in a small bowl.
              5. Then poke a toothpick into a ball and dip it in the chocolate. If you are worried about the balls looking perfect, you can poke the other end of the toothpick into an empty styrofoam egg carton while the chocolate hardens. 
              6. That's it! Allow the chocolate to set up and then eat them! 


                Tuesday, December 10, 2013

                Buche de Noel


                I went to my first Meetup on Sunday and of all things it was a baking Meetup! Unfortunately it started to snow about an hour before the event so I ended up being the only person (out of 15) that showed up! It really worked out in my favor though because I ended up getting several hours of one-on-one time with the hostess who is an experienced baker! I was able to ask her all kinds of questions and benefit from her experience. As you can see in the pictures we made a buche de Noel! 


                We used a vanilla sponge cake, filled it with a rum pastry cream, and topped it with a chocolate ganache! Then we used marzipan to make mushrooms and holly leaves for decoration!


                With some coaching, I think it turned out pretty darn well!


                Close up!


                One more, just because I'm proud of it!