Showing posts with label chocolate chips. Show all posts

Sunday, January 19, 2014

Oreo Balls


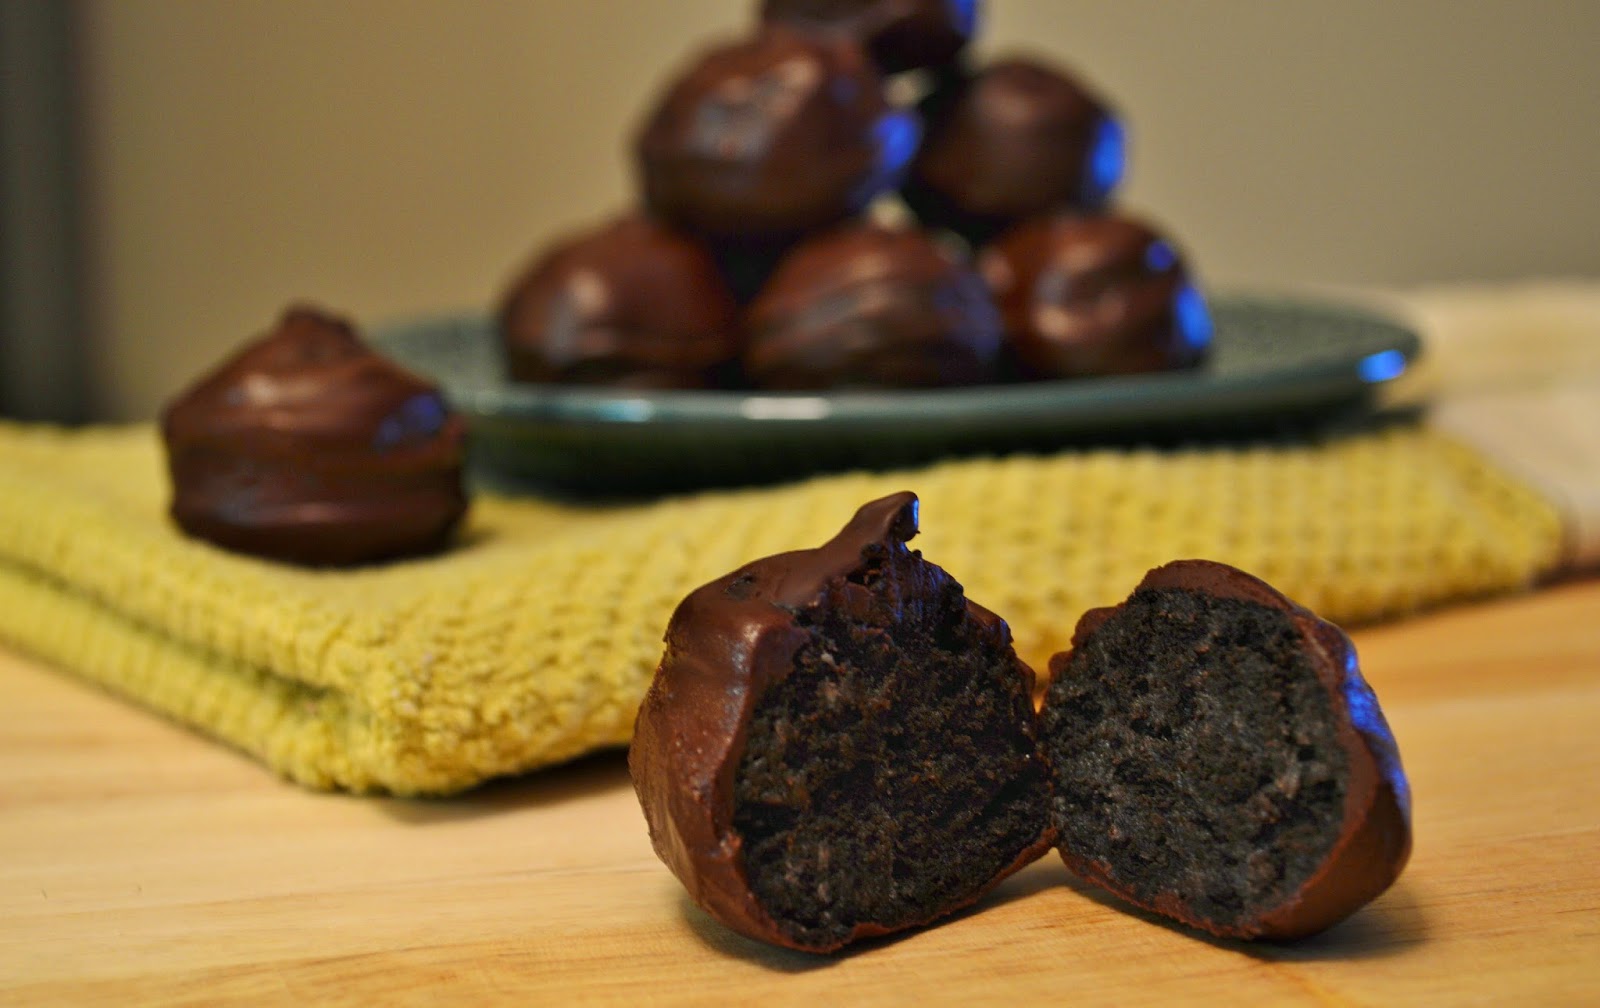
It seems like everyone has heard of cake balls these days, but I don't think Oreo balls have gotten near as much hype. I don't understand this because I like Oreo balls more and they are just as easy to make! They are basically the same thing, except instead of breaking up a cake and mixing it with cream cheese icing, you crush up some Oreos and mix it with cream cheese. I think the Oreos provide for a better texture in the balls and aren't so "mushy." 

To make 25-30 Oreo balls (depending on how big you make them) you will need:
  • 1 package OREOS (roughly 30 cookies)
  • 1 (8 oz.) package CREAM CHEESE, softened
  • 10-12 oz. of CHOCOLATE CHIPS or CHOCOLATE ALMOND BARK

NOTE: I think chocolate chips taste better than the chocolate almond bark, but the almond bark definitely sets up better than the chocolate chips. If you don't want to have to have to keep the Oreo balls refrigerated, then use the almond bark!

Start off by crushing up the Oreos. I tend to put the Oreos into a large baggie and hit them with the flat side of my meat tenderizer to accomplish this. You could also use a food processor, but I've had issues getting a consistent texture when I've tried that. 


Aim for a texture like the Oreos in the picture below. Then add the cream cheese.


Use your hands to mix the cream cheese into the crushed Oreos. You could use a spoon, but using your hands is so much easier!


Then roll the mixture into 1 inch balls. At this point I would recommend freezing the ball for a few hours (or overnight). It makes it so much easier to cover them in chocolate! Otherwise they tend to fall apart in the warm melted chocolate.


When you are ready to cover the balls, melt either the chocolate chips or chocolate almond bark in a small bowl.


Then poke a toothpick into an Oreo ball and dip it in the chocolate. If you are worried about the balls looking perfect, you can poke the other end of the toothpick into an empty styrofoam egg carton while the chocolate hardens as seen in the picture below. You can thank my husband for that idea!


That's it! Allow the chocolate to set up and then eat them!


Yum!


Oreo Balls

Ingredients:
  • 1 package OREOS (roughly 30 cookies)
  • 1 (8 oz.) package CREAM CHEESE, softened
  • 10-12 oz. of CHOCOLATE CHIPS or CHOCOLATE ALMOND BARK

      Directions:
      1. Start off by crushing up the Oreos. I tend to put the Oreos into a large baggie and hit them with the flat side of my meat tenderizer to accomplish this. You could also use a food processor, but I've had issues getting a consistent texture when I've tried that. 
      2. Add the cream cheese to the crushed Oreos. Use your hands to mix the cream cheese into the Oreos. 
      3. Then roll the mixture into 1 inch balls. At this point I would recommend freezing the ball for a few hours (or overnight). It makes it so much easier to cover them in chocolate! 
      4. When you are ready to cover the balls, melt either the chocolate chips or chocolate almond bark in a small bowl.
      5. Then poke a toothpick into a ball and dip it in the chocolate. If you are worried about the balls looking perfect, you can poke the other end of the toothpick into an empty styrofoam egg carton while the chocolate hardens. 
      6. That's it! Allow the chocolate to set up and then eat them! 


        Saturday, December 7, 2013

        Soft Baked Chocolate Chip Cookies


        So, basically chocolate chip cookies are delicious. I think that's really all the explanation I need. You should make chocolate chip cookies. End of story. But I will go on... I think chocolate chip cookies are especially delicious when they are fresh out of the oven because they are warm and soft! This recipe for chocolate chip cookies is great because the cookies don't get hard the day after baking them. They stay soft for several days and after popping them in the microwave for a few seconds they taste like they are fresh out of the oven!

        To make about 3 dozen cookies you will need:
        • 3/4 cup BUTTER, unsalted
        • 3/4 cup BROWN SUGAR, lightly packed
        • 1/2 cup SUGAR
        • 1 large EGG & 1 large EGG YOLK
        • 2 tsp VANILLA
        • 2 & 1/4 cup FLOUR
        • 1 tsp BAKING SODA
        • 1 & 1/2 tsp CORNSTARCH
        • 1/2 tsp SALT
        • 1 & 1/2 cup CHOCOLATE CHIPS

        Start by preheating your oven to 350 degrees F. Then cream together the butter, brown sugar, and sugar until the mixture is fluffy and light. 


        Next, mix in the egg, egg yolk, and vanilla. Once that has been combined, add the flour, baking soda, cornstarch, and salt.


        Lastly, mix in the chocolate chips!


        Form balls of dough about the size of a walnut and space them about 2 inches apart on a cookie sheet. Try to not eat all of the dough first ;)


        Bake the cookies for 10-12 minutes or until they are slightly brown around the edges and golden brown on top!


        Since my husband and I don't need to eat 3 dozen cookies at once and I like cookies fresh out of the oven, I only bake up a few cookie at a time and wrap the rest of the dough in cling wrap which I store in the fridge. This also allows me to eat some of the dough when I make the next batch... ;)


        Yummm... cookies... :)


        Soft Baked Chocolate Chip Cookies

        Ingredients:
        • 3/4 cup BUTTER, unsalted
        • 3/4 cup BROWN SUGAR, lightly packed
        • 1/2 cup SUGAR
        • 1 large EGG & 1 large EGG YOLK
        • 2 tsp VANILLA
        • 2 & 1/4 cup FLOUR
        • 1 tsp BAKING SODA
        • 1 & 1/2 tsp CORNSTARCH
        • 1/2 tsp SALT
        • 1 & 1/2 cup CHOCOLATE CHIPS

            Directions:
            1. Start by preheating your oven to 350 degrees F. Then cream together the butter, brown sugar, and sugar until the mixture is fluffy and light. 
            2. Next, mix in the egg, egg yolk, and vanilla. Once that has been combined, add the flour, baking soda, cornstarch, and salt.
            3. Lastly, mix in the chocolate chips!
            4. Form balls of dough about the size of a walnut and space them about 2 inches apart on a cookie sheet
            5. Bake the cookies for 10-12 minutes or until they are slightly brown around the edges and golden brown on top!


              I based this recipe on one that I found on the following blog:
              http://lingonberryjam.wordpress.com/2013/06/20/soft-baked-chocolate-chip-cookies/

              Tuesday, December 3, 2013

              Thanksgiving 2013

              I had such a wonderful Thanksgiving this year! My husband and I recently moved away from where our families live, but we were lucky enough to have our siblings and one of my closest friends come visit us for the holiday!

              We ended up having a total of 8 people over for Thanksgiving dinner this year so I took full advantage having so many people to cook for and made all kinds of things!

              I started off Thanksgiving week by making some kolaches, which are traditional Czechoslovakian pastries. They are made of a sweet dough and generally have a fruity filling. I made my brother and my favorite flavor, cherry!


              Look how gooey and yummy they were! I will post the recipe for these soon!


              Then, my brother helped me make my favorite spinach artichoke dip to snack on during Thanksgiving day!


              We even made the bread! I used the crusty bread recipe, but rather than shaping it into a ball I shaped it into a loaf. 


              My husband made his favorite Thanksgiving food, dressing!


              My husband and I decided that rather than making turkey for Thanksgiving, we wanted to make a ham. Some of our guests on the other hand, decided that they could not have Thanksgiving without a turkey. So one of them volunteered to make a turkey....and then another one volunteered to make a turkey... and then there was a little bit of a miscommunication and we ended up with 2 turkeys!!!

              Here is a picture of turkey #1, your classic turkey:


              And here is turkey #2, the 'burkey':


              And here is the ham that we made:


              And here are the sides! We had mashed potatoes, sauteed Brussels sprouts, sweet potato casserole, potato salad, dressing, green bean casserole, and rolls! Whew! That was a lot of food! And it was all so good!


              Here is a picture of the guys trying to figure out how to carve their birds!


              And here is my plate! Look at all of that delicious food!


              We weren't done yet! Now time for the desserts! My friend and I started off by making Oreo balls! They are super easy to make and so good! They are the perfect dessert for a chocoholic!


              And then we made a mini carrot cake using my mother-in-law's recipe! It was so delicious!


              Look at that yummy cake!


              Welp, that's all! I will be posting some of the recipes for things that we made over the next few weeks. If you have any questions or recipe requests just let me know! Happy Thanksgiving!

              Tuesday, November 12, 2013

              Easy Chocolate Fudge


              Fudge is so easy to make and it is delicious! To make a basic chocolate fudge you only need 3 ingredients!
              • 3 cups CHOCOLATE CHIPS
              • 1 (14 oz.) can SWEETENED CONDENSED MILK
              • 1/4 cup BUTTER, unsalted
              • Optional: 1 cup WALNUTS
              Put all of the ingredients into a microwave safe bowl and microwave in increments of 30 seconds (stir in between) until all of the ingredients have melted together! Then pour the chocolaty goodness into a wax paper lined 8 in. x 8 in. baking dish. Smooth the fudge so that it is spread evenly in the pan and then refrigerate until it is hard. Once the fudge has set up, use a heavy knife to cut the fudge into small pieces! Then eat them!


              I only had a 10 in. x 10 in. pan so my fudge was a little bit thinner than usual...it was still delicious though!


              Easy Chocolate Fudge

              Ingredients:
              • 3 cups CHOCOLATE CHIPS
              • 1 (14 oz.) can SWEETENED CONDENSED MILK
              • 1/4 cup BUTTER, unsalted
              • Optional: 1 cup WALNUTS
              Directions:
              1. Put all of the ingredients into a microwave safe bowl and microwave in increments of 30 seconds (stir in between) until all of the ingredients have melted together! 
              2. Pour the chocolaty goodness into a wax paper lined 8 in. x 8 in. baking dish. Smooth the fudge so that it is spread evenly in the pan and then refrigerate until it is hard. 
              3. Once the fudge has set up, use a heavy knife to cut the fudge into small pieces! Then eat them!

              Wednesday, October 30, 2013

              Molten Chocolate Cake


              Ok, so you know how the cake in the picture above looks delicious? Well that's because it is!!! Oh my goodness, it is so good! It is warm and chocolate-y and gooey and overall just fantastic! AND it's super easy!

              To make a dozen of these wonderful cakes you will need:
              • 3/4 cup of BUTTER 
              • 12 oz. CHOCOLATE CHIPS
              • 1/2 cup HEAVY CREAM
              • EGGS
              • 3/4 cup SUGAR
              • 2/3 cup FLOUR

              Add 3/4 cup butter, the chocolate chips, and the heavy cream to a microwave safe bowl. Microwave the contents 30 second at a time, stirring in between, until the ingredients are melted together and smooth.


              Allow the mixture to cool slightly so it is no longer hot to the touch. While the mixture is cooling, prepare the cupcake pan. Either coat the cups with some extra melted butter and then sprinkle in the cocoa powder OR just put some nonstick cooking spray in the cups!


              After the chocolate mixture has cooled and is just warm, mix in the eggs, sugar, and flour. 


              Once all of the ingredients are well mixed, fill up the cups in the cupcake pan. They won't rise very much so you can fill them almost all the way to the top. Then refrigerate for a minimum of one hour (and up to a few days). 


              When you are ready to bake, preheat the oven to 450 degrees F. If you are using a regular sized cupcake pan (12 cupcakes/pan) bake them for 8-10 minutes. If you are using a large cupcake pan (6 cupcakes/pan) bake them for 13-15 minutes.

              When the cakes are done they should be set around the sides and most of the top, but be a little runny at the center. (The ones in the picture below are slightly over cooked.) Let them cool for about 5 minutes after taking them out of the oven before removing them from the pan.


              Once they have cooled, turn them out onto a cookie sheet or clean surface and get ready to enjoy! I served mine with ice cream and a little bit of chocolate syrup, but whipped cream, caramel sauce, hot fudge, or any number of other things could also make a delicious topping. I highly recommend the ice cream though!


              Look how gooey and yummy it is! They even reheat well! Just microwave for about 30 seconds!


              **** I made these cakes again and refrigerated the batter for a few days before baking and they baked up a little differently (but were still delicious!) so here are some more pictures below...

              You can see in the picture below that the cake has set around the edges but are still a little runny at the center. This is what you want!!


              Here is what it looked like when I cut into it! Warm and gooey and yummy!


              Molten Chocolate Cake

              Ingredients:
              • 3/4 cup of BUTTER 
              • 12 oz. CHOCOLATE CHIPS
              • 1/2 cup HEAVY CREAM
              • EGGS
              • 3/4 cup SUGAR
              • 2/3 cup FLOUR
              Directions:
              1. Add 3/4 cup butter, the chocolate chips, and the heavy cream to a microwave safe bowl. Microwave the contents 30 second at a time, stirring in between, until the ingredients are melted together and smooth.
              2. Allow the mixture to cool slightly so it is no longer hot to the touch. While the mixture is cooling, prepare the cupcake pan. Either coat the cups with some extra melted butter and then sprinkle in the cocoa powder OR just put some nonstick cooking spray in the cups!
              3. After the chocolate mixture has cooled and is just warm, mix in the eggs, sugar, and flour. 
              4. Once all of the ingredients are well mixed, fill up the cups in the cupcake pan. They won't rise very much so you can fill them almost all the way to the top. Then refrigerate for a minimum of one hour (and up to a few days). 
              5. When you are ready to bake, preheat the oven to 450 degrees F. If you are using a regular sized cupcake pan (12 cupcakes/pan) bake them for 8-10 minutes. If you are using a large cupcake pan (6 cupcakes/pan) bake them for 13-15 minutes. When the cakes are done they should be set around the sides and most of the top, but be a little runny at the center. (The ones in the picture below are slightly over cooked.) 
              6. Let them cool for about 5 minutes after taking them out of the oven before removing them from the pan.
              7. Once they have cooled, turn them out onto a cookie sheet or clean surface and get ready to enjoy! I served mine with ice cream and a little bit of chocolate syrup, but whipped cream, caramel sauce, hot fudge, or any number of other things could also make a delicious topping. I highly recommend the ice cream though! 
              8. They even reheat well! Just microwave for about 30 seconds!


              I found this delicious treat on this website:
              http://jennysteffens.blogspot.com/2013/04/chocolate-molten-cakes-in-cupcake-pan.html

              Wednesday, October 2, 2013

              Nutter Butter Ghost Cookies

               
              These are one of my favorite cookies to make for Halloween! They are perfect for Halloween parties, bake sales, or just for fun! And they are super easy!

              To make them you will need:
              • 1 package WHITE ALMOND BARK (you will not need the whole package unless you are making A LOT of cookies)
              • 1 package NUTTER BUTTERS
              • 1 bag MINI CHOCOLATE CHIPS

              Melt a few blocks of the almond bark in a small bowl. Dip a nutter butter cookie three fourths way into the almond bark so it looks like the picture above. Lay the cookie onto a piece of wax paper and then stick two mini chocolate chips into the almond bark as eyes. Let the almond bark set up and then serve! That's it!

              The last time I made them was for a bake sale. Here are a few pictures of things other people made for the bake sale!


              Nutter Butter Ghost Cookies

              Ingredients:
              • 1 package WHITE ALMOND BARK (you will not need the whole package unless you are making A LOT of cookies)
              • 1 package NUTTER BUTTERS
              • 1 bag MINI CHOCOLATE CHIPS

                  Directions:
                  1. Melt a few blocks of the almond bark in a small bowl
                  2. Dip a nutter butter cookie three fourths way into the almond bark so it looks like the picture above. 
                  3. Lay the cookie onto a piece of wax paper and then stick two mini chocolate chips into the almond bark as eyes. 
                  4. Let the almond bark set up and then serve! That's it!


                  Wednesday, September 18, 2013

                  Chocolate Chip Buttermilk Scone


                  These scones are yummy and especially great to have with a nice cup of tea! To make this scone, you will need the following ingredients:
                  • 3/4 cup cold BUTTERMILK
                  • 1/4 cup + 1 & 1/2 Tbs SUGAR
                  • 2 tsp VANILLA EXTRACT
                  • 2 large EGGS
                  • 2 cups FLOUR
                  • 1 Tbs BAKING POWDER
                  • 1/2 tsp SALT
                  • 3 Tbs cold BUTTER, chopped into small pieces
                  • 3/4 cup CHOCOLATE CHIPS
                  Preheat your oven to 375 degrees F and then whisk the buttermilk, 1/4 cup sugar, vanilla, and 1 egg in a medium bowl.

                  In a large bowl, whisk together the flour, baking powder, salt. Then, using a pastry cutter or 2 knives, cut in the chilled butter until the contents resemble coarse meal. Next, mix in the chocolate chips and then add the milk mixture. Stir until the mixture is just moist. 

                  Take the dough out of the bowl and place it on a floured surface. Knead 4 times and then shape the dough into a 9 inch circle (should be about 3/4 inch thick) on a baking sheet that has been coated with nonstick cooking spray. Using a knife, make sure to cut the dough into 12 wedges before baking. 

                  Brush the top of the dough with an egg white and then sprinkle with the remaining 1 & 1/2 Tbs sugar. Place into the oven for about 18-20 minutes, until it is golden brown. The scones are best served warm!


                  Deep Dark Chocolate Cookies


                  These cookies are wonderful! They are gooey and chocolaty and easy to make! And unlike most cookie recipes, these have no flour or butter! That makes them healthy right? ;)

                  To make them you will need:
                  • 1 & 1/2 cups BITTERSWEET CHOCOLATE CHIPS
                  • 3 LARGE EGG WHITES
                  • 2 & 1/2 cups POWDERED SUGAR
                  • 1/2 cup COCOA POWDER
                  • 1 Tbs CORNSTARCH
                  • 1/4 tsp SALT
                  While the oven is preheating to 350 degrees F, melt 1 cup of the chocolate chips in a small bowl and then set aside to cool.

                  While the chocolate is cooling put the 3 egg whites into a mixer and whisk until they are fluffy and will stand in soft peaks. Mix in 1 cup of the powdered sugar gradually.

                  In a separate bowl, whisk together the cocoa powder, cornstarch, salt and another cup of powdered sugar. Using a low speed on your mixer, carefully add this dry mixture into the egg and sugar mixture.

                  Add the remaining 1/2 cup of chocolate chips to the melted chocolate chips once they have cooled enough to not melt the chips that are being added. Next, add this chocolate mixture into the dough and mix thoroughly! The dough will get very thick!

                  Roll a rounded tablespoon of dough into a ball and then in a dish that has the remaining 1/2 cup of powdered sugar. Your goal is to get a coating of powdered sugar all over the outside of the rounded ball of dough. Place the ball on a cookie sheet that has been sprayed with nonstick cooking spray. Repeat with this process with the rest of the dough placing the balls about 2 inches apart.

                  Bake for 10 minutes, until the tops are puffed and start to crack. I have a tendency to want to try to overcook them because they are somewhat gooey after 10 minutes if you look closely, but trust the recipe! They will continue to cook a little after you take them out of the oven and they are supposed to be a little gooey! After you pull them out of the oven, allow them to cool on the cookie sheet for about 10 minutes and then eat them!!!

                  Hope you enjoy!

                  The website where I found this recipe is: http://www.picklee.com/2012/02/07/deep-dark-chocolate-cookies-butter-flourless/