Showing posts with label cream cheese. Show all posts

Thursday, February 13, 2014

Red Velvet Cake Balls


I made these red velvet cake balls last year for a Valentine's bake sale and they were a hit! They were cake-y and creamy on the inside and have a hard chocolate coating on the outside! They are positively delicious!

To make 40-50 cake balls you will need:
  • 1 box RED VELVET CAKE MIX (prepared as directed on the box)
  • 1 can CREAM CHEESE ICING
  • ALMOND BARK (regular or white)

NOTE: I think chocolate chips taste better than the chocolate almond bark, but the almond bark definitely sets up better than the chocolate chips. If you don't want to have to have to keep the cake balls refrigerated, then use the almond bark! (you can still refrigerate them if they are covered in almond bark though)

Start off by baking the red velvet cake as directed on the box. (You could make the cake from scratch if you have a favorite recipe, but boxed cakes work just fine!) Once the cake has cooled, break it up with your hands in a large bowl.

Once the cake is broken up enough that it is just a pile of crumbs, mix in the cream cheese icing (I usually use my hands, but does get messy!). When the cake and icing is well mixed together, roll the mixture out into 1 inch balls. You should end up with 40-50 balls.

Depending on how much time you have, either refrigerate the balls overnight, or pop them in the freezer for a few hours. Having the balls chilled makes it so much easier to cover them in chocolate. Otherwise they tend to fall apart in the warm melted chocolate.

Once the balls are chilled, melt a few squares of almond bark in a small bowl in the microwave. Then dip each ball into the almond bark to coat them. For a tip on covering the balls in chocolate CLICK HERE to see my post of Oreo balls! When they are coated, place the balls onto a piece of wax paper to set up.

After all of the balls are coated in chocolate you can then decorate them by drizzling more almond bark over the top, rolling them in sprinkles, or anything else you can think of!


The Valentine's Day bake sale spread! Doesn't it all look delicious?!


Red Velvet Cake Balls

Ingredients:
  • 1 box RED VELVET CAKE MIX (prepared as directed on the box)
  • 1 can CREAM CHEESE ICING
  • ALMOND BARK (regular or white)
Directions:
  1. Start off by baking the red velvet cake as directed on the box. (You could make the cake from scratch if you have a favorite recipe, but boxed cakes work just fine!) Once the cake has cooled, break it up with your hands in a large bowl.
  2. Once the cake is broken up enough that it is just a pile of crumbs, mix in the cream cheese icing (I usually use my hands, but does get messy!). When the cake and icing is well mixed together, roll the mixture out into 1 inch balls. You should end up with 40-50 balls.
  3. Depending on how much time you have, either refrigerate the balls overnight, or pop them in the freezer for a few hours. Having the balls chilled makes it so much easier to cover them in chocolate. Otherwise they tend to fall apart in the warm melted chocolate.
  4. Once the balls are chilled, melt a few squares of almond bark in a small bowl in the microwave. Then dip each ball into the almond bark to coat them. For a tip on covering the balls in chocolate CLICK HERE to see my post of Oreo balls! When they are coated, place the balls onto a piece of wax paper to set up.
  5. After all of the balls are coated in chocolate you can then decorate them by drizzling more almond bark over the top, rolling them in sprinkles, or anything else you can think of!


    Monday, February 3, 2014

    Mexican Stuffed Shells


    These stuffed shells have all of the flavors of a taco, but are in stuffed into pasta shells rather than taco shells! Yum! 

    To make 3 to 4 servings of these Mexican stuffed shell you will need:
    • 1 lb. GROUND BEEF
    • 3/4 tsp CUMIN
    • 1/2 tsp CHILI POWDER
    • 1/4 tsp PAPRIKA
    • 1/4 tsp CAYENNE
    • 1/4 tsp GARLIC POWDER
    • 1/4 tsp SALT
    • 4 oz. CREAM CHEESE
    • 14-18 JUMBO PASTA SHELLS
    • 1 cup SALSA
    • 1 cup TACO SAUCE
    • 1 cup CHEDDAR CHEESE, shredded
    • 1 cup MONTEREY JACK CHEESE, shredded
    • 3 chopped GREEN ONIONS, to garnish
    • SOUR CREAM, to garnish

    Start off by preheating the oven to 350 degrees. Start boiling a pot of water to cook the jumbo shells in. Once it comes to a boil, cook the shells until they are just under cooked. (They will finish cooking in the oven.) Drain the shells and then spread them out on a clean surface so they don't stick together.

    While the pasta is cooking, brown the ground beef in a skillet. Drain any excess liquid and then add all of the spices and the cream cheese. You can cover the pan to help the cream cheese melt faster, then mix it into the beef. Once mixed in, set the skillet aside to cool.


    Pour the salsa in the bottom of a 9 in. x 13 in. pan.


    Then, stuff each shell with the beef mixture and place them (open side up) on top of the salsa in the baking pan.


    Pour the taco sauce over the top of the shells making sure to get an even coating over all of the shells. Cover with aluminum foil and bake for 30 minutes.


    After 30 minutes, take the pan out of the oven and sprinkle the cheddar and monterey jack cheese over the top. Bake uncovered for another 15 minutes.


    Once it is done baking, serve it up and top with green onions, sour cream, and more salsa!


    Mexican Stuffed Shells

    Ingredients:
    • 1 lb. GROUND BEEF
    • 3/4 tsp CUMIN
    • 1/2 tsp CHILI POWDER
    • 1/4 tsp PAPRIKA
    • 1/4 tsp CAYENNE
    • 1/4 tsp GARLIC POWDER
    • 1/4 tsp SALT
    • 4 oz. CREAM CHEESE
    • 14-18 JUMBO PASTA SHELLS
    • 1 cup SALSA
    • 1 cup TACO SAUCE
    • 1 cup CHEDDAR CHEESE, shredded
    • 1 cup MONTEREY JACK CHEESE, shredded
    • 3 chopped GREEN ONIONS, to garnish
    • SOUR CREAM, to garnish

        Directions:
        1. Start off by preheating the oven to 350 degrees. Start boiling a pot of water to cook the jumbo shells in. Once it comes to a boil, cook the shells until they are just under cooked. (They will finish cooking in the oven.) Drain the shells and then spread them out on a clean surface so they don't stick together.
        2. While the pasta is cooking, brown the ground beef in a skillet. Drain any excess liquid and then add all of the spices and the cream cheese. You can cover the pan to help the cream cheese melt faster, then mix it into the beef. Once mixed in, set the skillet aside to cool.
        3. Pour the salsa in the bottom of a 9 in. x 13 in. pan
        4. Then, stuff each shell with the beef mixture and place them (open side up) on top of the salsa in the baking pan. 
        5. Pour the taco sauce over the top of the shells making sure to get an even coating over all of the shells. 
        6. Cover with aluminum foil and bake for 30 minutes
        7. After 30 minutes, take the pan out of the oven and sprinkle the cheddar and monterey jack cheese over the top. Bake uncovered for another 15 minutes
        8. Once it is done baking, serve it up and top with green onions, sour cream, and more salsa!


          I found the recipe of the following blog: http://apinchofthisandthat.wordpress.com/2009/01/02/mexican-stuffed-shells/

          Sunday, January 19, 2014

          Oreo Balls


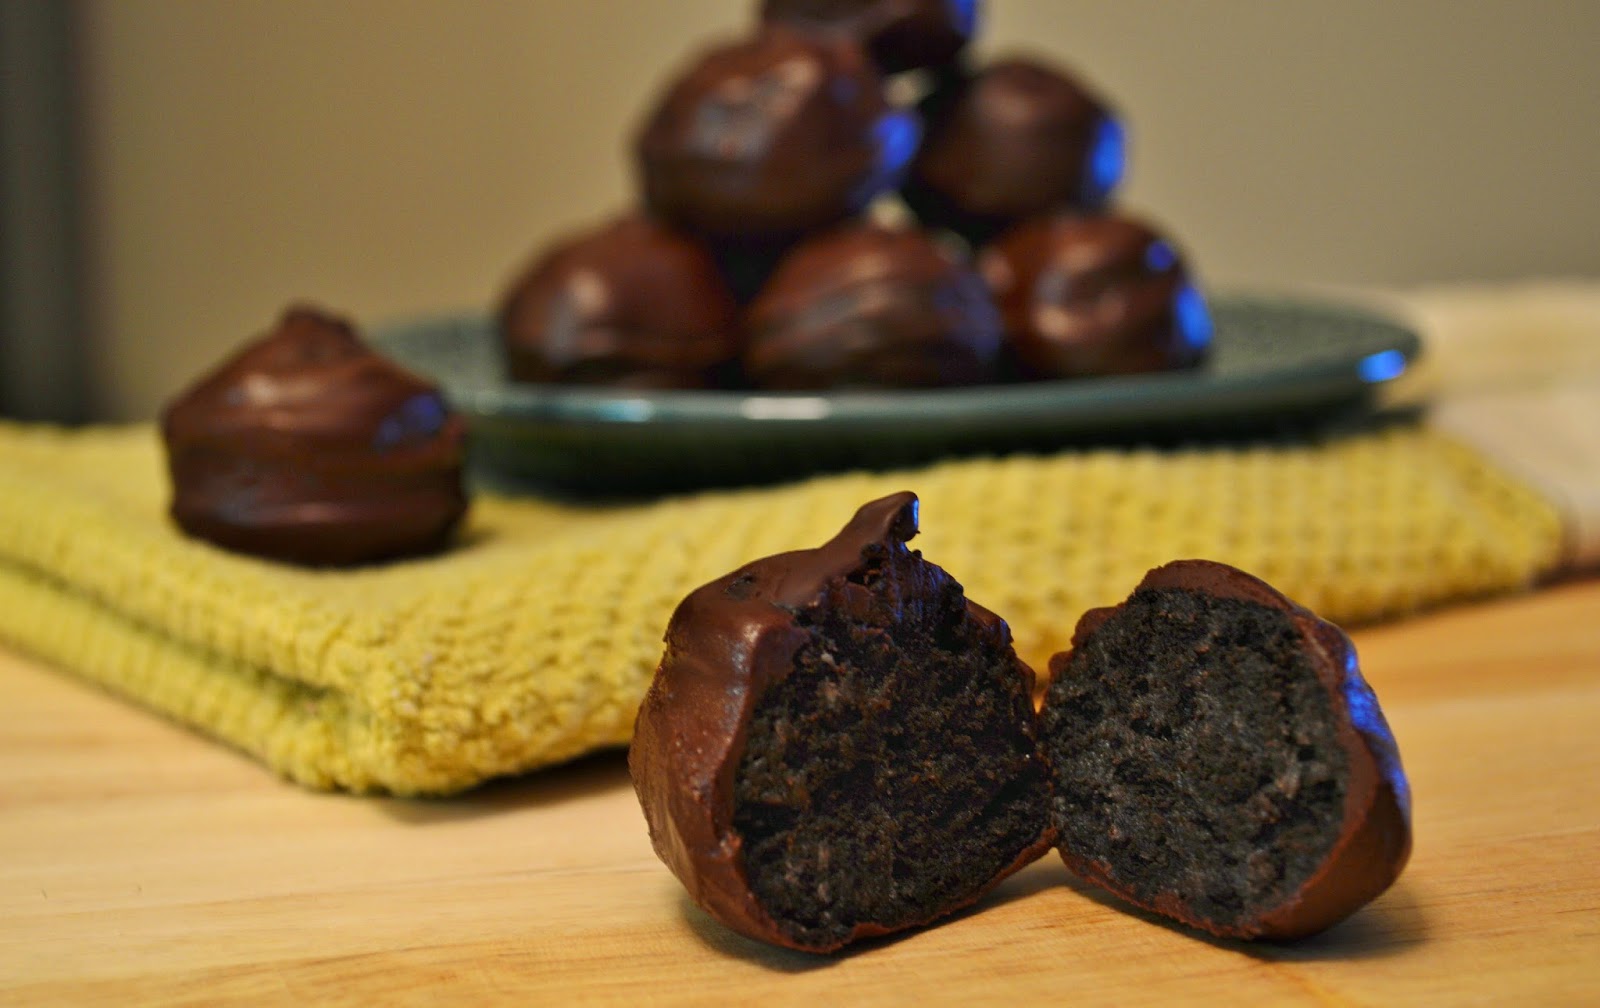
          It seems like everyone has heard of cake balls these days, but I don't think Oreo balls have gotten near as much hype. I don't understand this because I like Oreo balls more and they are just as easy to make! They are basically the same thing, except instead of breaking up a cake and mixing it with cream cheese icing, you crush up some Oreos and mix it with cream cheese. I think the Oreos provide for a better texture in the balls and aren't so "mushy." 

          To make 25-30 Oreo balls (depending on how big you make them) you will need:
          • 1 package OREOS (roughly 30 cookies)
          • 1 (8 oz.) package CREAM CHEESE, softened
          • 10-12 oz. of CHOCOLATE CHIPS or CHOCOLATE ALMOND BARK

          NOTE: I think chocolate chips taste better than the chocolate almond bark, but the almond bark definitely sets up better than the chocolate chips. If you don't want to have to have to keep the Oreo balls refrigerated, then use the almond bark!

          Start off by crushing up the Oreos. I tend to put the Oreos into a large baggie and hit them with the flat side of my meat tenderizer to accomplish this. You could also use a food processor, but I've had issues getting a consistent texture when I've tried that. 


          Aim for a texture like the Oreos in the picture below. Then add the cream cheese.


          Use your hands to mix the cream cheese into the crushed Oreos. You could use a spoon, but using your hands is so much easier!


          Then roll the mixture into 1 inch balls. At this point I would recommend freezing the ball for a few hours (or overnight). It makes it so much easier to cover them in chocolate! Otherwise they tend to fall apart in the warm melted chocolate.


          When you are ready to cover the balls, melt either the chocolate chips or chocolate almond bark in a small bowl.


          Then poke a toothpick into an Oreo ball and dip it in the chocolate. If you are worried about the balls looking perfect, you can poke the other end of the toothpick into an empty styrofoam egg carton while the chocolate hardens as seen in the picture below. You can thank my husband for that idea!


          That's it! Allow the chocolate to set up and then eat them!


          Yum!


          Oreo Balls

          Ingredients:
          • 1 package OREOS (roughly 30 cookies)
          • 1 (8 oz.) package CREAM CHEESE, softened
          • 10-12 oz. of CHOCOLATE CHIPS or CHOCOLATE ALMOND BARK

              Directions:
              1. Start off by crushing up the Oreos. I tend to put the Oreos into a large baggie and hit them with the flat side of my meat tenderizer to accomplish this. You could also use a food processor, but I've had issues getting a consistent texture when I've tried that. 
              2. Add the cream cheese to the crushed Oreos. Use your hands to mix the cream cheese into the Oreos. 
              3. Then roll the mixture into 1 inch balls. At this point I would recommend freezing the ball for a few hours (or overnight). It makes it so much easier to cover them in chocolate! 
              4. When you are ready to cover the balls, melt either the chocolate chips or chocolate almond bark in a small bowl.
              5. Then poke a toothpick into a ball and dip it in the chocolate. If you are worried about the balls looking perfect, you can poke the other end of the toothpick into an empty styrofoam egg carton while the chocolate hardens. 
              6. That's it! Allow the chocolate to set up and then eat them! 


                Monday, October 21, 2013

                Chocolate Mousse Cheesecake


                I found this recipe for chocolate mousse cheesecake on Pinterest and it is heavenly! It has a mouthwatering Oreo cookie crust, with a creamy cheesecake, and is topped with an espresso mousse and a smooth chocolate ganashe! I think I might leave out the mousse layer next time and just have the chocolate ganashe. It was delicious, I just don't think the cheesecake needed it.

                Disclaimer: This cheesecake takes a long time to prepare and is easiest if prepared over two days. It is totally worth it though!

                To make the OREO COOKIE CRUST you will need:
                • 30 OREO COOKIES (one package)
                • 4 Tbs UNSALTED BUTTER, melted
                • 1-2 tsp ESPRESSO POWDER, optional

                To make the CHEESECAKE you will need:
                • 2 (8 oz.) boxes CREAM CHEESE, at room temperature
                • 2/3 cup SUGAR
                • 1/4 tsp SALT
                • 1 tsp VANILLA EXTRACT
                • EGGS, at room temperature
                • 2/3 cup HEAVY CREAM

                To make the FRENCH CHOCOLATE MOUSSE you will need:
                • 6 oz. SEMISWEET BAKING CHOCOLATE, (1 cup chocolate chips)
                • 3 Tbs UNSALTED BUTTER
                • 2 tsp ESPRESSO POWDER, optional
                • EGGS, separated
                • 1/2 tsp CREAM OF TARTAR
                • 1/4 cup + 2 Tbs SUGAR
                • 1/2 cup HEAVY CREAM, cold
                • 1/2 tsp VANILLA EXTRACT

                To make the CHOCOLATE GANACHE you will need:
                • 1/2 cup HEAVY CREAM
                • 4.5 oz. BITTERSWEET CHOCOLATE
                • 1 & 1/2 tsp VANILLA EXTRACT

                The first thing you need to do is make the crust. To do this you either need a large baggie and a rolling pin, or a food processor. Using your equipment of choice, crush up about 30 Oreo cookies until they are Oreo crumbs. Then mix in the 4 tablespoons of butter and espresso powder. Once the butter and espresso powder are well incorporated, use a glass or measuring cup to press the mixture into a 9 inch spring-form pan. Wrap a double layer of aluminum foil around the bottom of the pan and then put it in the freezer while you make the cheesecake!


                 Preheat the oven to 325 degrees F. Also start to boil several cups of water. In a stand mixer, beat the cream cheese on medium speed for about 4 minutes. Add in 2/3 cup of sugar, 1/4 tsp of salt, and 1 tsp vanilla. Mix for another 4 minutes. Beat in the 2 eggs one at a time, letting each mix in for a minute before adding the next. Lastly, turn the mixer speed down to low and add 2/3 cup heavy cream.


                Put the cream cheese mixture into the pan with the crust. It should fill the pan about halfway. Then put the pan into a large roasting pan (or 10 x 10 inch baking dish if that is all you have) and add the boiling water into the roasting pan in order to create a water bath for cheesecake. Fill the roasting pan until the water goes about halfway up the outside of the spring-form pan.


                Bake the cheesecake for 1 hour & 15 minutes to 1 hour & 30 minutes. The cheesecake may rise slightly over the top of the pan and will be slightly brown on top. After baking, turn the oven off and prop the oven door open, but leave the cheesecake in the oven for an extra hour to 'luxuriate' in the water bath.


                After an hour the cheesecake will have fallen back down to about halfway up the side of the pan. Remove the spring-form pan from the water bath an remove the aluminum foil. Allow the cake to sit out until it reaches room temperature. Then cover and refrigerate overnight, or for a minimum of 4 hours.


                To make the mousse start by melting 6 oz. semisweet baking chocolates and 3 tablespoons of butter in a heat proof bowl over a pot of simmering water. Whisk in the espresso powder in order to intensify the flavor of the chocolate a bit.


                Remove the bowl from the heat and allow the chocolate to cool slightly. Then whisk in the 3 egg yolks one by one. (Keep the egg whites in a separate bowl or put them into your stand mixer!!) 


                Whisk the egg whites until they are foamy. Then add 1/2 tsp cream of tartar and continue beating. Slowly mix in 1/4 cup sugar and continue mixing until stiff peaks form.


                Gently fold the egg white mixture into the (room temperature) chocolate mixture to lighten it.


                Then, use your electric mixer to whip 1/2 cup of heavy cream. When it starts to thicken up add 2 tablespoons of sugar and 1/2 tsp vanilla. Continue whipping until the cream forms soft peaks. 


                Then, gently fold the whipped cream into the chocolate and egg white mixture. Be careful not to overwork the mousse, but still make sure that everything is well incorporated.


                Spread a layer of mousse over the top of the chilled cheesecake. You will have extra mousse so don't worry about trying to put all of it on top. Cover the cheesecake and put it in the freezer for 30 minutes. (Don't leave the cheesecake in the freezer for more than 30 minutes. If you are going to chill it for longer, put it in the refrigerator.)


                While the cheesecake and mousse are chilling you can start preparing the ganache! Heat 1/2 cup heavy cream in a small saucepan until it is just about to boil and then turn off the heat. Mix in 4.5 ounces of bittersweet chocolate until smooth. Then mix in 1 & 1/2 teaspoon of vanilla. Let the ganache cool for at least 15 minutes before smoothing it over the top of the mousse on the cheesecake.


                Once the ganashe has cooled (and the cheesecake chilled for at least 30 minutes) spread the ganashe over the top of the mousse. You may have a little extra ganashe as well. Chill the cheesecake for at least another 15 minutes to allow the ganashe to set up (I'm sorry! I know you're so close now!!) Then you can release the cheesecake from the spring-form pan!! Finally! You're done!

                Here are some pictures of my cheesecake!


                It looks (& tastes!) so good!!

                Is your mouth watering yet??


                Chocolate Mousse Cheesecake

                Ingredients:

                To make the OREO COOKIE CRUST you will need:
                • 30 OREO COOKIES
                • 4 Tbs UNSALTED BUTTER, melted
                • 1-2 tsp ESPRESSO POWDER, optional
                To make the CHEESECAKE you will need:
                • 2 (8 oz.) boxes CREAM CHEESE, at room temperature
                • 2/3 cup SUGAR
                • 1/4 tsp SALT
                • 1 tsp VANILLA EXTRACT
                • EGGS, at room temperature
                • 2/3 cup HEAVY CREAM
                To make the FRENCH CHOCOLATE MOUSSE you will need:
                • 6 oz. SEMISWEET BAKING CHOCOLATE, (1 cup chocolate chips)
                • 3 Tbs UNSALTED BUTTER
                • 2 tsp ESPRESSO POWDER, optional
                • EGGS, separated
                • 1/2 tsp CREAM OF TARTAR
                • 1/4 cup + 2 Tbs SUGAR
                • 1/2 cup HEAVY CREAM, cold
                • 1/2 tsp VANILLA EXTRACT
                To make the CHOCOLATE GANACHE you will need:
                • 1/2 cup HEAVY CREAM
                • 4.5 oz. BITTERSWEET CHOCOLATE
                • 1 & 1/2 tsp VANILLA EXTRACT

                    Directions:

                    OREO COOKIE CRUST:
                    1. The first thing you need to do is make the crust. To do this you either need a large baggie and a rolling pin, or a food processor. Using your equipment of choice, crush up about 30 Oreo cookies until they are Oreo crumbs. 
                    2. Mix in the butter and espresso powder. 
                    3. Use a glass or measuring cup to press the mixture into a 9 inch spring-form pan. 
                    4. Wrap a double layer of aluminum foil around the bottom of the pan and then put it in the freezer while you make the cheesecake!
                    CHEESECAKE:
                    1.  Preheat the oven to 325 degrees F. Also start to boil several cups of water. 
                    2. In a stand mixer, beat the cream cheese on medium speed for about 4 minutes. Add in 2/3 cup of sugar, 1/4 tsp of salt, and 1 tsp vanilla. Mix for another 4 minutes. Beat in the 2 eggs one at a time, letting each mix in for a minute before adding the next. Lastly, turn the mixer speed down to low and add 2/3 cup heavy cream.
                    3. Put the cream cheese mixture into the pan with the crust. It should fill the pan about halfway. 
                    4. Put the pan into a large roasting pan (or 10 x 10 inch baking dish if that is all you have) and add the boiling water into the roasting pan in order to create a water bath for cheesecake. Fill the roasting pan until the water goes about halfway up the outside of the spring-form pan.
                    5. Bake the cheesecake for 1 hour & 15 minutes to 1 hour & 30 minutes. The cheesecake may rise slightly over the top of the pan and will be slightly brown on top. After baking, turn the oven off and prop the oven door open, but leave the cheesecake in the oven for an extra hour to 'luxuriate' in the water bath.
                    6. After an hour the cheesecake will have fallen back down to about halfway up the side of the pan.
                    7. Remove the spring-form pan from the water bath an remove the aluminum foil. Allow the cake to sit out until it reaches room temperature. Then cover and refrigerate overnight, or for a minimum of 4 hours.
                    FRENCH CHOCOLATE MOUSSE:
                    1. Start by melting 6 oz. semisweet baking chocolates and 3 tablespoons of butter in a heat proof bowl over a pot of simmering water. 
                    2. Whisk in the espresso powder in order to intensify the flavor of the chocolate a bit.
                    3. Remove the bowl from the heat and allow the chocolate to cool slightly. Then whisk in the 3 egg yolks one by one. (Keep the egg whites in a separate bowl or put them into your stand mixer!!) 
                    4. Whisk the egg whites until they are foamy. Then add 1/2 tsp cream of tartar and continue beating. Slowly mix in 1/4 cup sugar and continue mixing until stiff peaks form.
                    5. Gently fold the egg white mixture into the (room temperature) chocolate mixture to lighten it.
                    6. Then, use your electric mixer to whip 1/2 cup of heavy cream. When it starts to thicken up add 2 tablespoons of sugar and 1/2 tsp vanilla. Continue whipping until the cream forms soft peaks. 
                    7. Gently fold the whipped cream into the chocolate and egg white mixture. Be careful not to overwork the mousse, but still make sure that everything is well incorporated.
                    8. Spread a layer of mousse over the top of the chilled cheesecake. You will have extra mousse so don't worry about trying to put all of it on top. 
                    9. Cover the cheesecake and put it in the freezer for 30 minutes. (Don't leave the cheesecake in the freezer for more than 30 minutes. If you are going to chill it for longer, put it in the refrigerator.)
                    CHOCOLATE GANACHE:
                    1. While the cheesecake and mousse are chilling you can start preparing the ganache! Heat 1/2 cup heavy cream in a small saucepan until it is just about to boil and then turn off the heat. 
                    2. Mix in 4.5 ounces of bittersweet chocolate until smooth. Then mix in 1 & 1/2 teaspoon of vanilla. 
                    3. Let the ganache cool for at least 15 minutes before smoothing it over the top of the mousse on the cheesecake.
                    4. Once the ganashe has cooled (and the cheesecake chilled for at least 30 minutes) spread the ganashe over the top of the mousse. You may have a little extra ganashe as well. 
                    5. Chill the cheesecake for at least another 15 minutes to allow the ganashe to set up. 
                    6. Release the cheesecake from the spring-form pan!! Finally! You're done!


                    I found this wonderful recipe on this website: http://www.mangiodasola.com/2010/02/chocolate-mousse-cheesecake.html

                    Friday, September 27, 2013

                    Chocolate Cupcakes with Cream Cheese Icing


                    I made these beautiful cupcakes for my first Sigma Alpha Iota, DC Alumnae Chapter meeting! They had a potluck so I decided to make cupcakes!

                    For the cake I used my chocolate cake recipe, which has become my 'go to' cake recipe because of how wonderful it is! And then I used my mother in law's cream cheese icing for the icing and roses. Now, before you go try to make roses with cream cheese icing, DON'T! They were delicious, but I will admit, choosing to make roses with cream cheese icing was not the smartest thing I have ever done. Cream cheese icing is much thicker and harder to work with than buttercream or royal icing, so I would suggest sticking with one of those for decorating... oops.


                    I added a leaf onto a few of them!