Tuesday, December 3, 2013

Thanksgiving 2013

I had such a wonderful Thanksgiving this year! My husband and I recently moved away from where our families live, but we were lucky enough to have our siblings and one of my closest friends come visit us for the holiday!

We ended up having a total of 8 people over for Thanksgiving dinner this year so I took full advantage having so many people to cook for and made all kinds of things!

I started off Thanksgiving week by making some kolaches, which are traditional Czechoslovakian pastries. They are made of a sweet dough and generally have a fruity filling. I made my brother and my favorite flavor, cherry!


Look how gooey and yummy they were! I will post the recipe for these soon!


Then, my brother helped me make my favorite spinach artichoke dip to snack on during Thanksgiving day!


We even made the bread! I used the crusty bread recipe, but rather than shaping it into a ball I shaped it into a loaf. 


My husband made his favorite Thanksgiving food, dressing!


My husband and I decided that rather than making turkey for Thanksgiving, we wanted to make a ham. Some of our guests on the other hand, decided that they could not have Thanksgiving without a turkey. So one of them volunteered to make a turkey....and then another one volunteered to make a turkey... and then there was a little bit of a miscommunication and we ended up with 2 turkeys!!!

Here is a picture of turkey #1, your classic turkey:


And here is turkey #2, the 'burkey':


And here is the ham that we made:


And here are the sides! We had mashed potatoes, sauteed Brussels sprouts, sweet potato casserole, potato salad, dressing, green bean casserole, and rolls! Whew! That was a lot of food! And it was all so good!


Here is a picture of the guys trying to figure out how to carve their birds!


And here is my plate! Look at all of that delicious food!


We weren't done yet! Now time for the desserts! My friend and I started off by making Oreo balls! They are super easy to make and so good! They are the perfect dessert for a chocoholic!


And then we made a mini carrot cake using my mother-in-law's recipe! It was so delicious!


Look at that yummy cake!


Welp, that's all! I will be posting some of the recipes for things that we made over the next few weeks. If you have any questions or recipe requests just let me know! Happy Thanksgiving!

Friday, November 29, 2013

Cronuts


Ok, so by now it seems like everyone has heard of the heavenly combination of croissant and doughnut known as the cronut, but not everyone has has the chance to try one (including me). So when I found a recipe for this cronut thing I jumped at the idea of being able to make them myself! And they turned out to be just as wonderful as all of the hype made them out to be!

The cronuts are not difficult to make, but plan ahead because the dough will take about 4 hours to prepare (to allow the dough to chill and rise). 

To make this delightful creation you will need:
  • OIL, for frying
Dough:
  • 3/4 cup MILK, warmed
  • 1 packet (2 & 1/4 tsp) ACTIVE DRY YEAST
  • 1/3 cup SUGAR
  • EGGS, large
  • 3 tsp VANILLA EXTRACT
  • 3 & 1/4 cups FLOUR
  • 1 tsp SALT
Filling:
  • 2 sticks BUTTER, at room temperature
  • 1/4 cup FLOUR
  • 3 tsp VANILLA EXTRACT
Buttermilk Vanilla Glaze:
  • 1 cup POWDERED SUGAR
  • 2 Tbs BUTTERMILK
  • 3 tsp VANILLA EXTRACT

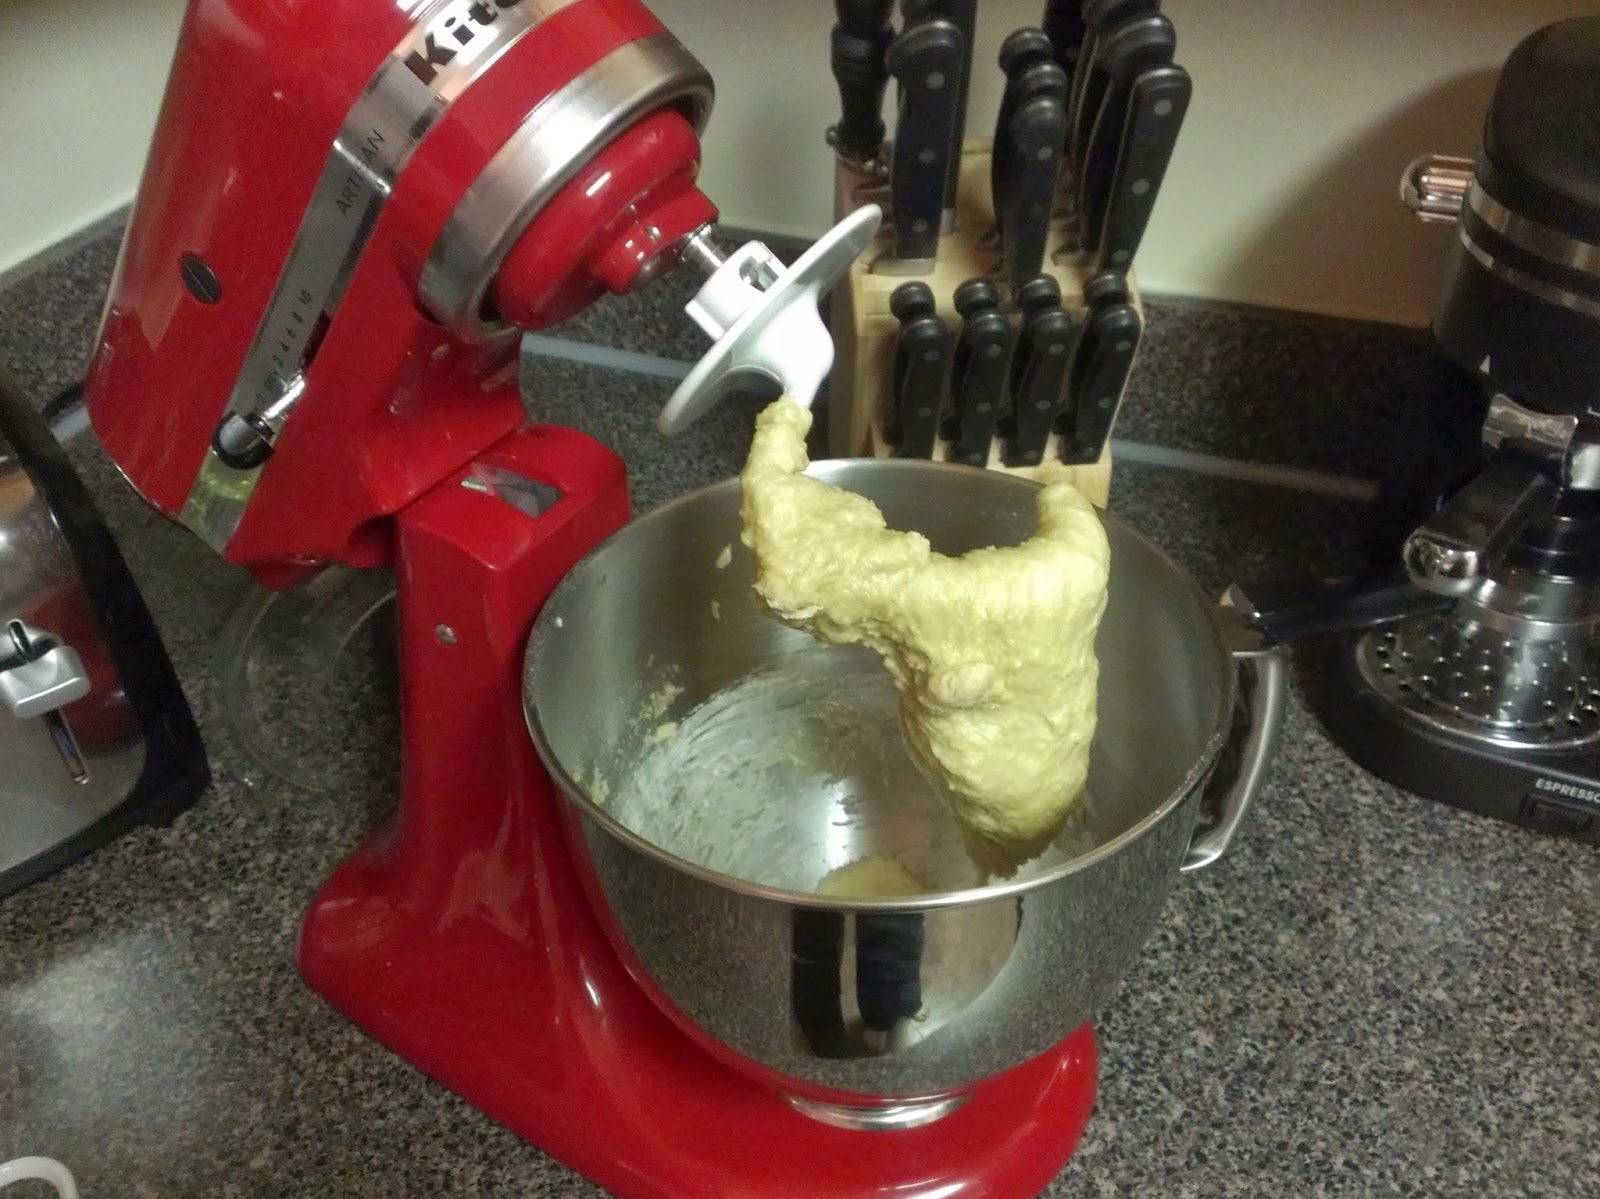
Start off by mixing the warm milk and yeast in the bowl of an electric mixer (or just a large bowl). Then allow the mixture to sit in the bowl for 5 minutes. Next, mix in the sugar, eggs, and vanilla. Once well combined, add one cup of flour and the salt. After the contents are well mixed again, slowly add in another 2 & 1/4 cups of flour.

Knead the dough for a few minutes until it is smooth and elastic. It will be pretty sticky at this point.


Form the dough into a ball and wrap it in plastic wrap. Chill it in the refrigerator for 30 minutes.


While the dough is chilling, mix the butter, vanilla, and remaining 1/4 cup flour until smooth.


After the dough has chilled for 30 minutes, roll it out on a lightly floured surface and shape it into a rectangle that is roughly 12 inches by 18 inches. Then, using a spatula, spread the butter, flour, and vanilla mixture on top of the dough.


Next, fold it into thirds (like you would fold a letter going into an envelope). Then cover with plastic wrap and refrigerate for 45 minutes.


After 45 minutes, take the dough out of the fridge and lay it back on the floured surface with the open sides to the left and right. Then roll it back out into a larger rectangle (as seen in the picture below on the right). 


After rolling it back out, fold it into thirds again. Fold the left third towards the middle and then the right third towards the middle (not top to bottom!). Then wrap it up in plastic wrap again and chill for another 45 minutes.


Repeat this process of rolling the dough out, folding it into thirds, and refrigerating for 45 minutes, TWO more times! (You will do this a total of FOUR times!)


By the last time, my dough started to take on a prettier, more uniform, rectangular shape. After you've finished all of the rolling, folding, and chilling, refrigerate the dough for a minimum of another hour to allow the dough to rise. You want the dough to be about 1 & 1/2 inches thick.


Then use a doughnut cutter (or in my case a glass...


...and a shot glass) to cut out the cronuts. 


I made a half batch so I only got 6 cronuts, but a full batch should make about 12. Make sure to keep the cronuts refrigerated until you are ready to fry them.


Once you are ready to fry up the cronuts, heat a few inches of oil in a pot to about 350 degrees F. If you don't have a kitchen thermometer, test the oil with a piece of scrap dough to make sure it is at the right temperature (hot enough that the dough sizzles when dropped into the oil, but not so hot that it starts to burn before the inside is cooked).


Once the dough is at the right temperature, drop the cronuts into the oil and cook until they are golden brown! They should look something like this!


In a small bowl, make the glaze by whisking together the powdered sugar, buttermilk, and vanilla. Drizzle the glaze over the cronuts while are still warm!


They are best served warm and fresh! Don't they look delicous?!?!


Look at all of the flaky layers! YUM!!


On the website where I found this recipe, there was a comment suggesting that you could bake the cronuts instead of frying them. They suggested baking them at 425 degrees F for about 15 minutes. I haven't tried this yet, but it sounds like a great idea!


Cronuts
Ingredients:
  • OIL, for frying
Dough:
  • 3/4 cup MILK, warmed
  • 1 packet (2 & 1/4 tsp) ACTIVE DRY YEAST
  • 1/3 cup SUGAR
  • EGGS, large
  • 3 tsp VANILLA EXTRACT
  • 3 & 1/4 cups FLOUR
  • 1 tsp SALT
Filling:
  • 2 sticks BUTTER, at room temperature
  • 1/4 cup FLOUR
  • 3 tsp VANILLA EXTRACT
Buttermilk Vanilla Glaze:
  • 1 cup POWDERED SUGAR
  • 2 Tbs BUTTERMILK
  • 3 tsp VANILLA EXTRACT

      Directions:
      1. Start off by mixing the warm milk and yeast in the bowl of an electric mixer (or just a large bowl). Then allow the mixture to sit in the bowl for 5 minutes
      2. Next, mix in the sugar, eggs, and vanilla. Once well combined, add one cup of flour and the salt. After the contents are well mixed again, slowly add in another 2 & 1/4 cups of flour.
      3. Knead the dough for a few minutes until it is smooth and elastic. It will be pretty sticky at this point. Form the dough into a ball and wrap it in plastic wrap. Chill it in the refrigerator for 30 minutes.
      4. While the dough is chilling, mix the butter, vanilla, and remaining 1/4 cup flour until smooth. 
      5. After the dough has chilled for 30 minutes, roll it out on a lightly floured surface and shape it into a rectangle that is roughly 12 inches by 18 inches. Then, using a spatula, spread the butter, flour, and vanilla mixture on top of the dough.
      6. Next, fold it into thirds (like you would fold a letter going into an envelope). Then cover with plastic wrap and refrigerate for 45 minutes.
      7. After 45 minutes, take the dough out of the fridge and lay it back on the floured surface with the open sides to the left and right. Then roll it back out into a larger rectangle (as seen in the picture below on the right). 
      8. After rolling it back out, fold it into thirds again. Fold the left third towards the middle and then the right third towards the middle (not top to bottom!). Then wrap it up in plastic wrap again and chill for another 45 minutes.
      9. Repeat this process of rolling the dough out, folding it into thirds, and refrigerating for 45 minutes, TWO more times! (You will do this a total of FOUR times!)
      10. After you've finished all of the rolling, folding, and chilling, refrigerate the dough for a minimum of another hour to allow the dough to rise. You want the dough to be about 1 & 1/2 inches thick.
      11. Then use a doughnut cutter (or in my case a glass and a shot glass) to cut out the cronuts. I made a half batch so I only got 6 cronuts, but a full batch should make about 12. Make sure to keep the cronuts refrigerated until you are ready to fry them.
      12. Once you are ready to fry up the cronuts, heat a few inches of oil in a pot to about 350 degrees F. If you don't have a kitchen thermometer, test the oil with a piece of scrap dough to make sure it is at the right temperature (hot enough that the dough sizzles when dropped into the oil, but not so hot that it starts to burn before the inside is cooked).
      13. Once the dough is at the right temperature, drop the cronuts into the oil and cook until they are golden brown! 
      14. In a small bowl, make the glaze by whisking together the powdered sugar, buttermilk, and vanilla. Drizzle the glaze over the cronuts while are still warm!
      15. They are best served warm and fresh! 
      Side Note: On the website where I found this recipe, there was a comment suggesting that you could bake the cronuts instead of frying them. They suggested baking them at 425 degrees F for about 15 minutes. I haven't tried this yet, but it sounds like a great idea!


      I found this recipe on this blog: http://saltandsmokefood.com/buttermilk-vanilla-glazed-croissant-donuts/

      Wednesday, November 27, 2013

      Chicken & Asparagus Risotto


      What's great about this dish is that you don't have to use a particular vegetable. I chose to use asparagus, but the recipe I based this on used a bell pepper. I think that mushrooms, carrots, or peas would also be very good! 

      Now, this was my first shot at making a risotto, so if it doesn't look quite right please forgive me! I think it was little more dry than a typical risotto, but it was still very good!

      To make this chicken & asparagus risotto you will need (4 servings):
      • 1 Tbs OLIVE OIL
      • CHICKEN BREAST, cut into 1 inch cubes
      • ONION, diced
      • 1 bunch ASPARAGUS
      • 1 & 1/4 cups ARBORRIO RICE
      • 14 oz. CHICKEN or BEEF STOCK
      • 3 Tbs BUTTER
      • SALT
      • PEPPER
      • 1/2 cup WHITE WINE, pick your favorite!
      • PARMESAN CHEESE, to garnish
      Heat a tablespoon of oil in a large skillet or ceramic dutch oven. When the oil is hot add the chicken. Once the chicken has cooked through, add the diced onion and cook until the onion starts to get tender. Then melt the butter in the skillet. 

      Once the butter has melted, add the rice and stir everything together. Continue stirring for a few minutes to brown the rice a little bit, think 'toasted'. 


      Next, add the wine if you have it. If not, add 1/2 cup of your stock. Stir the mixture until the rice thickens. Continue adding stock 1/2 cup of the time, stirring frequently, and adding more liquid once the rice starts to thicken. You want the consistency to be 'slightly liquidy.' (The picture of the rice below is getting dry and needs stock to be added.) 

      While the rice is cooking, clean the asparagus and chop off the hard ends on the stalks. Then bake the asparagus for 8-10 minutes at 400 degrees F


      Once you have incorporated all of the stock, taste the rice. If it is still crunchy then add water 1/2 cup at a time until the rice is al-dente. When you are happy with the consistency of the rice, chop the asparagus into bite sized pieces and add them to the risotto. 


      It should look something like the picture below! Our risotto was actually a little bit thicker than your typical risotto. Ideally it would have a texture that is thick enough that it wouldn't run all over the plate, but not so thick that it hold its shape as much as mashed potatoes. (Ours was probably a little too close to the mashed potato texture. It was still delicious though!)


      After mixing in the asparagus, serve it warm, and top with parmesan cheese!


      Chicken & Vegetable Risotto
      Ingredients:
      • 1 Tbs OLIVE OIL
      • CHICKEN BREAST, cut into 1 inch cubes
      • ONION, diced
      • 1 bunch ASPARAGUS
      • 1 & 1/4 cups ARBORRIO RICE
      • 14 oz. CHICKEN or BEEF STOCK
      • 3 Tbs BUTTER
      • SALT
      • PEPPER
      • 1/2 cup WHITE WINE, pick your favorite!
      • PARMESAN CHEESE, to garnish

          Directions:
          1. Heat a tablespoon of oil in a large skillet or ceramic dutch oven. When the oil is hot add the chicken. Once the chicken has cooked through, add the diced onion and cook until the onion starts to get tender. Then melt the butter in the skillet. 
          2. Once the butter has melted, add the rice and stir everything together. Continue stirring for a few minutes to brown the rice a little bit, think 'toasted'. 
          3. Next, add the wine if you have it. If not, add 1/2 cup of your stock. Stir the mixture until the rice thickens. 
          4. Continue adding stock 1/2 cup of the time, stirring frequently, and adding more liquid once the rice starts to thicken. You want the consistency to be 'slightly liquidy.'
          5. While the rice is cooking, clean the asparagus and chop off the hard ends on the stalks. Then bake the asparagus for 8-10 minutes at 400 degrees F
          6. Once you have incorporated all of the stock, taste the rice. If it is still crunchy then add water 1/2 cup at a time until the rice is al-dente. When you are happy with the consistency of the rice, chop the asparagus into bite sized pieces and add them to the risotto. 
          7. Ideally it would have a texture that is thick enough that it wouldn't run all over the plate, but not so thick that it hold its shape as much as mashed potatoes. (The pictures above were probably a little too close to the mashed potato texture. It was still delicious though!)
          8. After mixing in the asparagus, serve it warm, and top with parmesan cheese!


          I found this recipe on the following website: http://www.sweetcsdesigns.com/one-pot-chicken-risotto/

          Monday, November 25, 2013

          Classic Baked Chicken Legs


          One of my favorite parts of the chicken is the leg. Whenever my mom would bring home a rotisserie chicken for dinner as a kid, my brother and I would always fight over who got the legs. Luckily, chickens have two legs and we both got one. This is a easy and classic recipe for baked chicken legs.

          To make these classic drumsticks all you need is:
          • DRUMSTICKS
          • OLIVE OIL
          • SALT
          • PEPPER

          Start off by preheating the oven to 400 degrees F. Coat the drumsticks in olive oil and sprinkle on a generous amount of salt and pepper. Lay the drumsticks down onto a lined baking pan skin side up. Bake for 30 minutes. Then lower the oven temperature to 350 degrees F and bake for another 10-30 minutes or until the chicken is cooked through.


          They should look something like the picture below! We made some mashed potatoes and spaghetti squash with garlic and butter to go with it! 


          Classic Baked Chicken Legs

          Ingredients:
          • DRUMSTICKS
          • OLIVE OIL
          • SALT
          • PEPPER

              Directions:
              1. Start off by preheating the oven to 400 degrees F
              2. Coat the drumsticks in olive oil and sprinkle on a generous amount of salt and pepper. 
              3. Lay the drumsticks down onto a lined baking pan skin side up. Bake for 30 minutes
              4. Lower the oven temperature to 350 degrees F and bake for another 10-30 minutes or until the chicken is cooked through.


              I found this recipe on this website: http://www.simplyrecipes.com/recipes/classic_baked_chicken/

              Saturday, November 23, 2013

              Can you freeze cupcake batter and still have good cupcakes? YES!!!


              I ran a little experiment regarding freezing cupcake batter and it totally worked! I have heard a lot of different things about whether or not the cupcakes would look or (more importantly) taste as good after freezing the batter so I set out to find the truth! 

              This experiment actually started off as an accident. I was making a half batch of chocolate cupcakes for a party and ended up forgetting to half one of the ingredients. So rather than starting over, I just made a whole batch. You can never have too many cupcakes right??

              I baked up half of the batter that night for the party and poured the other half in to a large baggie and popped it into the freezer. 


              Then, about 3 weeks later, I defrosted the batter and baked some cupcakes. The cupcakes in the picture below were made from frozen batter and don't they look wonderful?!


              Then I whipped up some vanilla icing and dug in! They tasted just as wonderful as usual! 

              Now here is the tip: If you are really busy, make your cake batter ahead of time and freeze it until you need it! Just defrost the batter overnight, or while you are at work, and you can have cupcakes made from scratch any day of the week!


              ----------------------------------------------------------------------------------------------------------------------------------------------------
              Chocolate Cake with Vanilla Icing

              Ingredients:

              Chocolate Cake:
              • 2 cups SUGAR
              • 1 & 3/4 cup FLOUR
              • 3/4 cup COCOA POWDER
              • 1 & 1/2 tsp BAKING POWDER
              • 1 & 1/2 tsp BAKING SODA
              • 1 tsp SALT
              • EGGS
              • 1 cup MILK
              • 1/2 cup VEGETABLE OIL
              • 2 tsp VANILLA EXTRACT
              • 1 cup BOILING WATER
              Vanilla Icing:
              • 2 cup SHORTENING 
              • 8 cup POWDERED SUGAR
              • 0.5 tsp SALT
              • 2 tsp VANILLA
              • 6 oz. HEAVY CREAM

                  Directions:


                  Chocolate Cake:
                  1. Preheat the oven to 350 degrees F and coating three 8 inch baking dishes in nonstick cooking spray and then flour to make the cake easier to remove from the dish after baking. 
                  2. In an electric mixer combine the sugar, flour, cocoa powder, baking powder, baking soda, and salt. 
                  3. Add the eggs, milk, vegetable oil, vanilla extract, and the boiling water making sure each ingredient is incorporated before adding the next.
                    • If you are making a cake, divide the batter equally into the three baking dishes and bake for 30-35 minutes.  Bake until you can insert a toothpick and have it come out clean. Let the cakes cool for at least 10 minutes before removing from the baking dishes. 
                       OR
                    • If you are making cupcakes with the batter, bake them for 15-18 minutes or until you can insert a toothpick and have it come out clean.

                      Vanilla Icing:
                      1. Cream the shortening in an electric mixer until it is fluffy. 
                      2. Slowly mix in the powdered sugar. 
                      3. Add the salt, vanilla, and cream. Mix until well combined. 
                      4. If it is too thick add more cream, if it is too thin add more powdered sugar.
                        ----------------------------------------------------------------------------------------------------------------------------------------------------

                        Thursday, November 21, 2013

                        Baked Parmesan Asparagus


                        This is super easy and super delicious! All you need is:
                        • 1 bunch of ASPARAGUS
                        • 1/4 cup PARMESAN CHEESE
                        • 2-3 Tbs OLIVE OIL
                        • SALT
                        • PEPPER
                        Preheat your oven to 400 degrees F. Rinse the asparagus and chop off the hard ends of each stalk. Arrange the asparagus on a baking tray and then drizzle a few tablespoons of olive oil over the top. Then sprinkle on some salt, pepper, and parmesan cheese! Now all you have to do is pop them in the oven and bake them for 8-10 minutes or until they are tender, but still have a bit of a crunch when you bit into them. 


                        Baked Parmesan Asparagus

                        Ingredients:
                        • 1 bunch of ASPARAGUS
                        • 1/4 cup PARMESAN CHEESE
                        • 2-3 Tbs OLIVE OIL
                        • SALT
                        • PEPPER

                            Directions:
                            1. Preheat your oven to 400 degrees F
                            2. Rinse the asparagus and chop off the hard ends of each stalk. 
                            3. Arrange the asparagus on a baking tray and then drizzle a few tablespoons of olive oil over the top. 
                            4. Sprinkle on some salt, pepper, and parmesan cheese! 
                            5. Bake them for 8-10 minutes or until they are tender, but still have a bit of a crunch when you bit into them. 


                            Wednesday, November 20, 2013

                            Spaghetti Squash with Garlic and Butter


                            Nothing says fall to me quite like squash, except for maybe cool air and crunchy, colorful leaves. Spaghetti squash has a sort of sweet, rich, almost nutty flavor and the texture of, you guessed it, spaghetti! I have heard lot of people say they actually use this squash as a spaghetti substitute even though the flavor is quite different. This recipe is a simple and delicious way to prepare spaghetti squash.

                            To make this dish you will need:
                            • SPAGHETTI SQUASH (3-4 pounds)
                            • 2 Tbs BUTTER
                            • 2 cloves GARLIC, minced
                            • 1/4 cup FRESH PARSLEY or about 1 & 1/2 Tbs DRIED PARSLEY
                            • 1/2 tsp SALT
                            • 1/4 cup PARMESAN CHEESE, shredded

                            First off you need to cook the squash. To do this you can bake it or microwave it. Either way you need to pierce the skin of the squash several times with a sharp knife in order to allow the steam to escape (Basically stab it a few times, but be careful! The skin is very tough!). If you choose to bake it, preheat your oven to 375 degrees F and then bake it on a cookie sheet for 1 hour. Or you could take the quicker route and put it on a plate and microwave it for 10-12 minutes making sure to rotate the squash half-way through. Your choice! The squash is done cooking when you can pierce the squash with your knife fairly easily.


                            After cooking your squash, cut it open lengthwise and scoop out the seeds. 


                            Then take a fork and scrape the stringy, spaghetti-like squash out.


                            Melt 2 tablespoons butter in a large skillet over medium heat and then add the garlic. Once the garlic is tender, add the squash, parsley, and salt. 


                            Toss all of the ingredients together and then add the shredded cheese. Cook for a few minutes to allow the cheese to melt. Ideally the squash should still have a little bit of a crunch when you take it off of the heat. 

                            Transfer the squash to a bowl and garnish it with a little bit of fresh parsley and parmesan cheese. Then sit back and enjoy the flavors of fall!


                            --------------------------------------------------------------------------------------------------------------------------------------------
                            Spaghetti Squash with Garlic & Butter

                            Ingredients:
                            • SPAGHETTI SQUASH
                            • 2 Tbs BUTTER
                            • 2 cloves GARLIC, minced
                            • 1/4 cup FRESH PARSLEY or about 1.5 Tbs DRIED PARSLEY
                            • 1/2 tsp SALT
                            • 1/4 cup PARMESAN CHEESE, shredded

                                Directions:
                                1. Pierce the skin of the squash several times with a sharp knife in order to allow the steam to escape while cooking (Basically stab it a few times, but be careful! The skin is very tough!). The squash is done cooking when you can pierce the squash with your knife fairly easily.
                                  • If you choose to bake it, preheat your oven to 375 degrees F and then bake it on a cookie sheet for 1 hour. 
                                  • If you choose to microwave it, put it on a plate and heat it for 10-12 minutes making sure to rotate the squash half-way through.
                                2. After cooking your squash, cut it open lengthwise and scoop out the seeds. 
                                3. Then take a fork and scrape the stringy, spaghetti-like squash out.
                                4. Melt 2 tablespoons butter in a large skillet over medium heat and then add the garlic. 
                                5. Once the garlic is tender, add the squash, parsley, and salt. 
                                6. Toss all of the ingredients together and then add the shredded cheese. Cook for a few minutes to allow the cheese to melt. Ideally the squash should still have a little bit of a crunch when you take it off of the heat. 
                                7. Transfer the squash to a bowl and garnish it with a little bit of fresh parsley and parmesan cheese. Then sit back and enjoy the flavors of fall!
                                  --------------------------------------------------------------------------------------------------------------------------------------------


                                  I found this delicious fall side dish on this website: http://www.steamykitchen.com/11285-baked-spaghetti-squash-with-garlic-and-butter.html