Saturday, February 22, 2014

Beer Brats


A few weeks ago we made these bratwursts and they were delicious! We boiled the brats in Guinness and then seared them in a pan to get as much flavor as possible out of them! Top that with some onions, sauerkraut, and mustard and dig in!

To make some beer brats for yourself you will need:
  • 5 BEEF BRATWURSTS (we used Johnsonville)
  • 1 small ONION, sliced
  • 2 cloves GARLIC, minced
  • 2 bottles of GUINNESS (or other stout beer, but I think Guinness tastes the best!)
  • 1 (14.4 oz.) can SAUERKRAUT 
  • YELLOW MUSTARD
  • 5 BUNS
This recipe can be easily scaled up if you need to feed more people, but in most cases you can't buy fewer than 5 brats so that is what I have based this recipe on. 

Pour the Guinness into a large pot and bring it to a boil. Chop the onion into slices and throw them in the pot!


While you are waiting for the Guinness to boil, poke each brat several times with a fork to allow the flavors to seep into the meat.


Once the Guinness is boiling, throw the brats in! Boil the brats for 10-15 minutes.


After the brats have are fully cooked, transfer them to a skillet and cook on medium-high for a few minutes to get some color (and more flavor!) on the brats.


While the brats are cooking in the skillet, pour the sauerkraut into a small pot and heat it on medium for a few minutes to warm it up. Stir occasionally.


Once the sauerkraut is hot and the brats have some color on them, assemble your brat! I like to squirt mustard strait onto the bun and then place the brat and sauerkraut on top! You can also top them with the onions that were boiled in the Guinness and just skip the sauerkraut!


Beer Brats
Ingredients:
This recipe can be easily scaled up if you need to feed more people, but in most cases you can't buy fewer than 5 brats so that is what I have based this recipe on.
  • BEEF BRATWURSTS (we used Johnsonville)
  • 1 small ONION, sliced
  • 2 cloves GARLIC, minced
  • 2 bottles of GUINNESS (or other stout beer, but I think Guinness tastes the best!)
  • 1 (14.4 oz.) can SAUERKRAUT 
  • YELLOW MUSTARD
  • BUNS
    Directions:
    1. Pour the Guinness into a large pot and bring it to a boil. Chop the onion into slices and throw them in the pot!
    2. While you are waiting for the Guinness to boil, poke each brat several times with a fork to allow the flavors to seep into the meat.
    3. Once the Guinness is boiling, throw the brats in! Boil the brats for 10-15 minutes.
    4. After the brats have are fully cooked, transfer them to a skillet and cook on medium-high for a few minutes to get some color (and more flavor!) on the brats.
    5. While the brats are cooking in the skillet, pour the sauerkraut into a small pot and heat it on medium for a few minutes to warm it up. Stir occasionally.
    6. Once the sauerkraut is hot and the brats have some color on them, assemble your brat! I like to squirt mustard strait onto the bun and then place the brat and sauerkraut on top! You can also top them with the onions that were boiled in the Guinness and just skip the sauerkraut!


      Thursday, February 20, 2014

      Zesty Bruschetta Chicken


      I love this dish, it combines several of my favorite foods into one meal! A grilled chicken breast is topped with chopped tomato, olive oil, garlic, and basil all over a bed of fettuccine alfredo! Yum! I didn't say it was particularly healthy did I? ...the tomatoes balance out the alfredo sauce though right?? 

      To make this dish for two people you will need:
      • 1 (8-10 oz.) CHICKEN BREAST, sliced long-wise into two thin pieces
      • KRAFT ZESTY ITALIAN DRESSING (enough to cover the chicken as a marinade)
      • 4 ROMA TOMATOES, cubed
      • 6 BASIL LEAVES or 1 Tbs DRIED BASIL, chopped
      • 2-3 GARLIC CLOVES, minced
      • 5-6 Tbs EXTRA VIRGIN OLIVE OIL
      • 4 oz. FETTUCCINE (or your favorite type of pasta)
      • PARMESAN or ROMANO CHEESE, shredded (to sprinkle on top of the dish)
      For the alfredo sauce you can either buy a jar of sauce OR you could make it using the following ingredients:
      • 2 Tbs UNSALTED BUTTER,
      • 1/4 cup HEAVY CREAM
      • 1/2 cup PARMESAN CHEESE, grated (I like to use 1/4 cup GRATED & 1/4 cup SHREDDED because it creates a lighter sauce, but we usually keep both on hand anyway so it isn't a big deal for us.)
      • SALT & PEPPER, to taste

      Start by putting the split chicken breast into a small container and pour the zesty Italian salad dressing over the top until the chicken is just covered. Allow the chicken to marinate for a minimum of 30 minutes in the refrigerator. It could be left to marinate over night.


      While the chicken is marinating, start heating a large pot of water for the pasta. Chop the tomatoes into bite sized pieces. Mix the tomatoes with the basil, garlic, and olive oil in a small bowl. Set aside.


      Once the water in the large pot has come to a boil, cook your pasta according to the label on the box (generally about 10 minutes). When the chicken has marinated for at least 30 minutes, grill it! (You could use a grill pan, a George Foreman grill, or an actual grill if you have one!) 


      While the chicken and pasta are cooking, melt the butter in a small pot. Once the butter is melted, add the heavy cream, and then stir in 1/4 cup of grated parmesan cheese. 

      When the pasta is fully cooked, drain the water and then pour the cream sauce over the pasta in a medium sized bowl. Toss the pasta in the sauce and then sprinkle on the remaining 1/4 cup parmesan cheese (either grated or shredded). Continue tossing the pasta until the cheese, sauce, and pasta are well mixed!


      Once the chicken is cooked all the way through, remove it from the grill and slice it. 


      To assemble the dish, divide the pasta between two bowls. Then divide the sliced chicken and place it on top of the pasta. Spoon the tomato mixture over the top and then sprinkle on a little bit of parmesan or romano cheese!


      Delicous!


      Zesty Bruschetta Chicken
      Ingredients:
      To make this dish for two people you will need:
      • 1 (8-10 oz.) CHICKEN BREAST, sliced long-wise into two thin pieces
      • KRAFT ZESTY ITALIAN DRESSING (enough to cover the chicken as a marinade)
      • ROMA TOMATOES, cubed
      • BASIL LEAVES or 1 Tbs DRIED BASIL, chopped
      • 2-3 GARLIC CLOVES, minced
      • 5-6 Tbs EXTRA VIRGIN OLIVE OIL
      • 4 oz. FETTUCCINE (or your favorite type of pasta)
      • PARMESAN or ROMANO CHEESE, shredded (to sprinkle on top of the dish)
      For the alfredo sauce you can either buy a jar of sauce OR you could make it using the following ingredients:
      • 2 Tbs UNSALTED BUTTER,
      • 1/4 cup HEAVY CREAM
      • 1/2 cup PARMESAN CHEESE, grated (I like to use 1/4 cup GRATED & 1/4 cup SHREDDED because it creates a lighter sauce, but we usually keep both on hand anyway so it isn't a big deal for us.)
      • SALT PEPPER, to taste
      Directions:

      1. Start by putting the split chicken breast into a small container and pour the zesty Italian salad dressing on top until the chicken is just covered. Allow the chicken to marinate for a minimum of 30 minutes in the refrigerator. It could be left to marinate over night
      2. While the chicken is marinating, start heating a large pot of water for the pasta. 
      3. Chop the tomatoes into bite sized pieces. Mix the tomatoes with the basil, garlic, and olive oil in a small bowl. Set aside.
      4. Once the water in the large pot has come to a boil, cook your pasta according to the label on the box (generally about 10 minutes). 
      5. When the chicken has marinated for at least 30 minutes, grill it! (You could use a grill pan, a George Foreman grill, or an actual grill if you have one!) 
      6. While the chicken and pasta are cooking, melt the butter in a small pot. Once the butter is melted, add the heavy cream, and then stir in 1/4 cup of grated parmesan cheese. 
      7. When the pasta is fully cooked, drain the water and then pour the cream sauce over the pasta in a medium sized bowl. Toss the pasta in the sauce and then sprinkle on the remaining 1/4 cup parmesan cheese (either grated or shredded). Continue tossing the pasta until the cheese, sauce, and pasta are well mixed!
      8. Once the chicken is cooked all the way through, remove it from the grill and slice it. 
      9. To assemble the dish, divide the pasta between two bowls. Then divide the sliced chicken and place it on top of the pasta. Spoon the tomato mixture over the top and then sprinkle on a little bit of parmesan or romano cheese!


        I got this recipe from the following website: http://myprizedrecipes.com/three-cheese-chicken-penne-pasta-applebees-style/

        Tuesday, February 18, 2014

        Fried Rice


        Whether it is the main part of my meal or on the side, I always order chicken fried rice when I get Chinese food. How could I not? It is so delicious! My husband and I have been trying to find a good chicken fried rice recipe for about a year now and we have finally found a good one! By combining a ideas from a few different recipes we have manages to create a recipe that tastes just like take out!

        To make 3 to 4 servings of chicken fried rice you will need:
        • 1 cup RICE, uncooked
        • Optional: 12-16 oz. of CHICKEN BREAST or THIGHS, cubed (If you are vegetarian you could leave the chicken out altogether!)
        • 2 Tbs CORNSTARCH
        • 1/4 cup + 2 tsp SOY SAUCE
        • 2 cups PEAS & CARROTS, frozen
        • 1 medium ONION
        • 1 EGG
        • 1 Tbs SESAME OIL
        • 1 tsp OYSTER SAUCE

        The first thing to do is cook the rice. It is important to do this ahead of time so the rice is cold when you get ready to prepare the dish. Boil the rice in a large pot of water for 10 minutes. When the rice is tender, use a strainer to drain the water out of the rice and then refrigerate it for a few hours or until the rice is cold (you could do this the night before if that is more convenient). 


        When you are ready to make the fried rice, mix the cubed chicken with 2 tablespoons of cornstarch, 2 teaspoons of soy sauce, and a splash of water. Let this mixture sit and marinate for 10 minutes.


        While the chicken is marinating, chop the onion and measure out the peas and carrots. (I like to have plenty of veggies in my fried rice!) Set aside.


        Once the chicken is done marinating, cook the chicken in a large skillet. Then, transfer the chicken to a bowl or plate and set aside.


        Add a tablespoon of sesame oil into the now empty skillet over medium-high heat. When the oil gets hot, add the cold rice, the onion, the carrots, and the peas. Cook the mixture for 10 minutes, stirring occasionally to keep the rice from burning.


        After the 10 minutes,  push the rice and vegetables to one side of the skillet. Then scramble the egg in the open side of the pan. When the egg is cooked, mix it into the rice.


        Add the chicken back into the skillet and stir it into the rice mixture.


        Lastly, stir in 1/4 cup of soy sauce and 1 tsp of oyster sauce. Then eat up! 


        Doesn't it look good?!


        Yum!


        Chicken Fried Rice

        Ingredients:
        • 1 cup RICE, uncooked
        • 12-16 oz. of CHICKEN BREAST, cubed
        • 2 Tbs CORNSTARCH
        • 1/4 cup + 2 tsp SOY SAUCE
        • 2 cups PEAS CARROTS, frozen
        • 1 medium ONION
        • EGG
        • 1 Tbs SESAME OIL
        • 1 tsp OYSTER SAUCE

            Directions:
            1. The first thing to do is cook the rice. It is important to do this ahead of time so the rice is cold when you get ready to prepare the dish. Boil the rice in a large pot of water for 10 minutes. When the rice is tender, use a strainer to drain the water out of the rice and then refrigerate it for a few hours or until the rice is cold (you could do this the night before if that is more convenient). 
            2. When you are ready to make the fried rice, mix the cubed chicken with 2 tablespoons of cornstarch, 2 teaspoons of soy sauce, and a splash of water. Let this mixture sit and marinate for 10 minutes
            3. While the chicken is marinating, chop the onion and measure out the peas and carrots. Set aside.
            4. Once the chicken is done marinating, cook the chicken in a large skillet. Then, transfer the chicken to a bowl or plate and set aside.
            5. Add a tablespoon of sesame oil into the now empty skillet over medium-high heat. When the oil gets hot, add the cold rice, the onion, the carrots, and the peas. Cook the mixture for 10 minutes, stirring occasionally to keep the rice from burning. 
            6. After the 10 minutes,  push the rice and vegetables to one side of the skillet. Then scramble the egg in the open side of the pan. When the egg is cooked, mix it into the rice. 
            7. Add the chicken back into the skillet and stir it into the rice mixture.
            8. Lastly, stir in 1/4 cup of soy sauce and 1 tsp of oyster sauce. Then eat up! 


              I combined a few different recipes to make this one. The recipes that I took ideas from are the following:          http://rachelschultz.com/2012/07/14/better-than-takeout-chicken-fried-rice/

              Sunday, February 16, 2014

              Hot Roast Beef Sandwich


              These delicious roast beef sandwiches are perfect for lunch! (...or dinner, you just might want to eat two!) They are simple to make and are easily made ahead of time! The cheese in the sandwich gets gooey when you heat it up and the sauce has a nice tangy flavor from the horseradish and mustard. Pair that with the thinly sliced roast beef and you get a perfect balance of flavors!

              To make 5 sandwiches (which could be a weeks worth of lunches!) you will need:
              • HAMBURGER BUNS
              • 7 oz. ROAST BEEF, thinly sliced
              • 5 slices of PROVOLONE CHEESE
              • 5 slices of AMERICAN CHEESE 
              • ALUMINUM FOIL
              For the sauce you will need:
              • 2 Tbs MAYO
              • 2 Tbs SPICY MUSTARD
              • 1/2 to 1 Tbs POPPY SEEDS (I used 1 Tbs, but next time I will probably cut back)
              • 1 Tbs CHOPPED ONIONS
              • 1/2 Tbs HORSERADISH
              • Dash of WORCESTERSHIRE SAUCE

              If you plan on eating a sandwich right after making them, preheat your oven to 350 degrees F. Then, mix together the mayo, spicy mustard, poppy seeds, chopped onions, horseradish, and Worcestershire sauce in a small bowl.


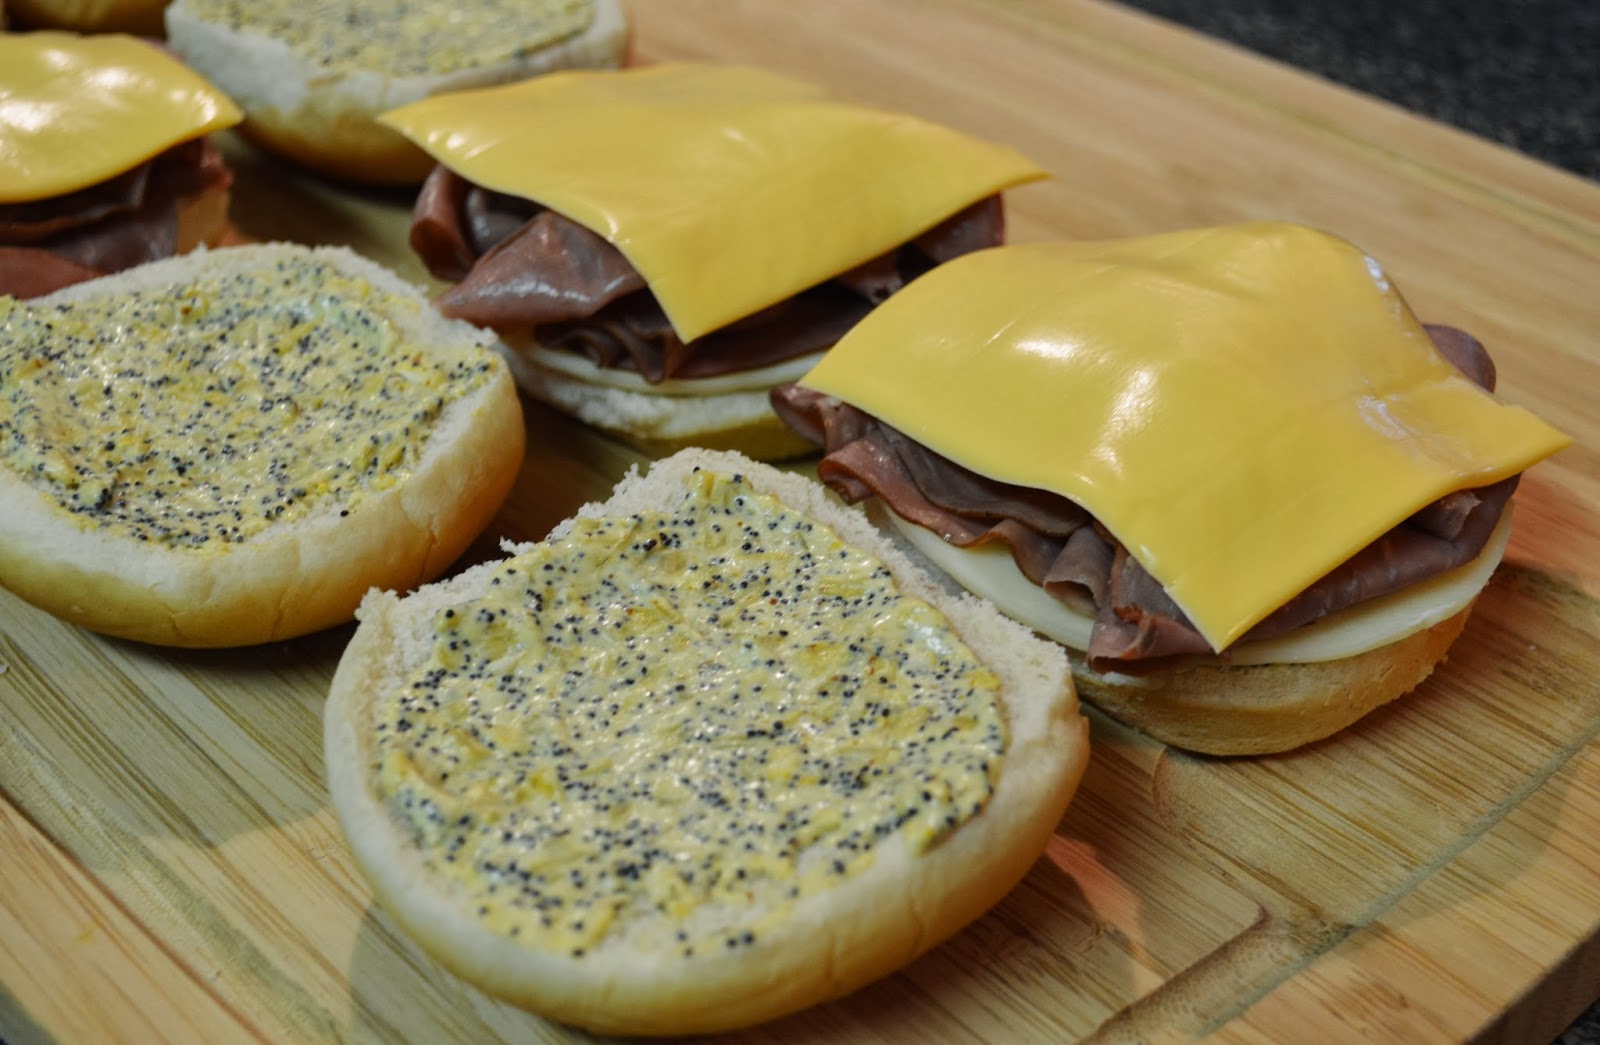
              It should look something like this!


              Then, spread the sauce onto the inside of both pieces of each bun.


              Next, place a slice of provolone onto the bottom bun...


              ...then put the roast beef on top of the provolone (I used about 3 slices of roast beef per sandwich)...


              ...then put the American cheese on top of the roast beef...


              ...and lastly, place the top half of the bun on top!


              Repeat this process for all of the sandwiches (...or just do it all at once like I do!).


              Now, you could eat the sandwich as is, but I like to take it a step further. I wrap each sandwich in foil... 


              ...and then pop them in the oven at 350 degrees F for 15 to 20 minutes. If you don't have an oven handy, then just warm the sandwiches in the microwave until the cheese gets gooey! (DON'T PUT THE FOIL INTO THE MICROWAVE!)


              If you don't want to eat them all at once, simply put the foil wrapped sandwiches in to a large baggie and pop the baggie into the fridge! If you don't plan on eating all of the sandwiches in about a week and a half, then pop the baggie into the freezer! They will last several months in the freezer!


               Yum! Look how gooey and melted the cheese is!
                

              Once the cheese is melted, sit back and enjoy!


              Hot Roast Beef Sandwich

              Ingredients:
                
              To make 5 sandwiches you will need:
              • HAMBURGER BUNS
              • 7 oz. ROAST BEEF, thinly sliced
              • 5 slices of PROVOLONE CHEESE
              • 5 slices of AMERICAN CHEESE 
              • ALUMINUM FOIL
              For the sauce you will need:
              • 2 Tbs MAYO
              • 2 Tbs SPICY MUSTARD
              • 1/2 to 1 Tbs POPPY SEEDS (I used 1 Tbs, but next time I will probably cut back)
              • 1 Tbs CHOPPED ONIONS
              • 1/2 Tbs HORSERADISH
              • Dash of WORCESTERSHIRE SAUCE

                  Directions:
                  1. If you plan on eating a sandwich right after making them, preheat your oven to 350 degrees F. Then, mix together the mayo, spicy mustard, poppy seeds, chopped onions, horseradish, and Worcestershire sauce in a small bowl.
                  2. Spread the sauce onto the inside of both pieces of all of the buns.
                  3. Next, place a slice of provolone onto the bottom bun, then put the roast beef on top of the provolone (I used about 3 slices of roast beef per sandwich), then put the American cheese on top of the roast beef, and lastly, place the top half of the bun on top!
                  4. Now, you could eat the sandwich as is, but I like to take it a step further. I wrap each sandwich in foil and then pop them in the oven at 350 degrees F for 15 to 20 minutes. If you don't have an oven handy, then just warm the sandwiches in the microwave until the cheese gets gooey! (DON'T PUT THE FOIL INTO THE MICROWAVE!)
                  5. If you don't want to eat them all at once, simply put the foil wrapped sandwiches in to a large baggie and pop the baggie into the fridge! If you don't plan on eating all of the sandwiches in about a week and a half, then pop the baggie into the freezer! They will last several months in the freezer!


                    I got this recipe from the Pioneer Woman: http://www.foodnetwork.com/recipes/ree-drummond/hot-roast-beef-sandwiches.html

                    Friday, February 14, 2014

                    Valentine's Sugar Cookies

                    Here is one more Valentine's treat! Every year the collegiate chapter of Sigma Alpha Iota that I was initiated into has a bake sale for Valentine's Day. They usually have 2-3 bake sales a year and as a member I always got really excited when one started to get close because that meant I got to bake something! So this year, even though I have now graduated, I decided to make a special treat to send to the girls for the bake sale! I'll use any excuse I can find to bake something! ;)

                    I decided to make some Valentine's sugar cookies so I could try out a new decorating technique and I think they turned out pretty well! I forgot to take pictures until the last minute so that is why most of the pictures are of the cookies already bagged and in the box!

                    I think this one was my favorite! I didn't plan on making black (or I guess dark grey) and white flowers, but I started running out of pink so I gave it a try and I think they turned out beautifully!

                    These were probably my second favorite, simple, yet pretty! I probably need to get some more practice with writing on cookies though... 

                    Onto the box pictures! Haha. Here is the first layer of cookies that went into the box! So pretty! I will definitely make these again!

                    ...and the second layer!

                    ...and the top layer! 

                    I hope you liked my cookies because I sure enjoyed making them!


                    Thursday, February 13, 2014

                    Red Velvet Cake Balls


                    I made these red velvet cake balls last year for a Valentine's bake sale and they were a hit! They were cake-y and creamy on the inside and have a hard chocolate coating on the outside! They are positively delicious!

                    To make 40-50 cake balls you will need:
                    • 1 box RED VELVET CAKE MIX (prepared as directed on the box)
                    • 1 can CREAM CHEESE ICING
                    • ALMOND BARK (regular or white)

                    NOTE: I think chocolate chips taste better than the chocolate almond bark, but the almond bark definitely sets up better than the chocolate chips. If you don't want to have to have to keep the cake balls refrigerated, then use the almond bark! (you can still refrigerate them if they are covered in almond bark though)

                    Start off by baking the red velvet cake as directed on the box. (You could make the cake from scratch if you have a favorite recipe, but boxed cakes work just fine!) Once the cake has cooled, break it up with your hands in a large bowl.

                    Once the cake is broken up enough that it is just a pile of crumbs, mix in the cream cheese icing (I usually use my hands, but does get messy!). When the cake and icing is well mixed together, roll the mixture out into 1 inch balls. You should end up with 40-50 balls.

                    Depending on how much time you have, either refrigerate the balls overnight, or pop them in the freezer for a few hours. Having the balls chilled makes it so much easier to cover them in chocolate. Otherwise they tend to fall apart in the warm melted chocolate.

                    Once the balls are chilled, melt a few squares of almond bark in a small bowl in the microwave. Then dip each ball into the almond bark to coat them. For a tip on covering the balls in chocolate CLICK HERE to see my post of Oreo balls! When they are coated, place the balls onto a piece of wax paper to set up.

                    After all of the balls are coated in chocolate you can then decorate them by drizzling more almond bark over the top, rolling them in sprinkles, or anything else you can think of!


                    The Valentine's Day bake sale spread! Doesn't it all look delicious?!


                    Red Velvet Cake Balls

                    Ingredients:
                    • 1 box RED VELVET CAKE MIX (prepared as directed on the box)
                    • 1 can CREAM CHEESE ICING
                    • ALMOND BARK (regular or white)
                    Directions:
                    1. Start off by baking the red velvet cake as directed on the box. (You could make the cake from scratch if you have a favorite recipe, but boxed cakes work just fine!) Once the cake has cooled, break it up with your hands in a large bowl.
                    2. Once the cake is broken up enough that it is just a pile of crumbs, mix in the cream cheese icing (I usually use my hands, but does get messy!). When the cake and icing is well mixed together, roll the mixture out into 1 inch balls. You should end up with 40-50 balls.
                    3. Depending on how much time you have, either refrigerate the balls overnight, or pop them in the freezer for a few hours. Having the balls chilled makes it so much easier to cover them in chocolate. Otherwise they tend to fall apart in the warm melted chocolate.
                    4. Once the balls are chilled, melt a few squares of almond bark in a small bowl in the microwave. Then dip each ball into the almond bark to coat them. For a tip on covering the balls in chocolate CLICK HERE to see my post of Oreo balls! When they are coated, place the balls onto a piece of wax paper to set up.
                    5. After all of the balls are coated in chocolate you can then decorate them by drizzling more almond bark over the top, rolling them in sprinkles, or anything else you can think of!


                      Wednesday, February 12, 2014

                      Chipotle's Cilantro Lime Rice Copycat


                      Last weekend we had some friends over for a burrito night and we decided to try to recreate Chipotle's cilantro lime rice. It turned out to be quite easy and delicious!

                      To make the rice you will need:
                      • 2 cups RICE (uncooked)
                      • 4 Tbs LIME JUICE
                      • 1/2 bunch CILANTRO (1/2 to 3/4 cup chopped)

                      Start of by cooking the rice. I know, crazy right? Once the rice is cooked you will end up with about 6 cups of rice. You could easily cut this recipe down, but we were cooking for 5 hungry guys so we needed plenty of food!


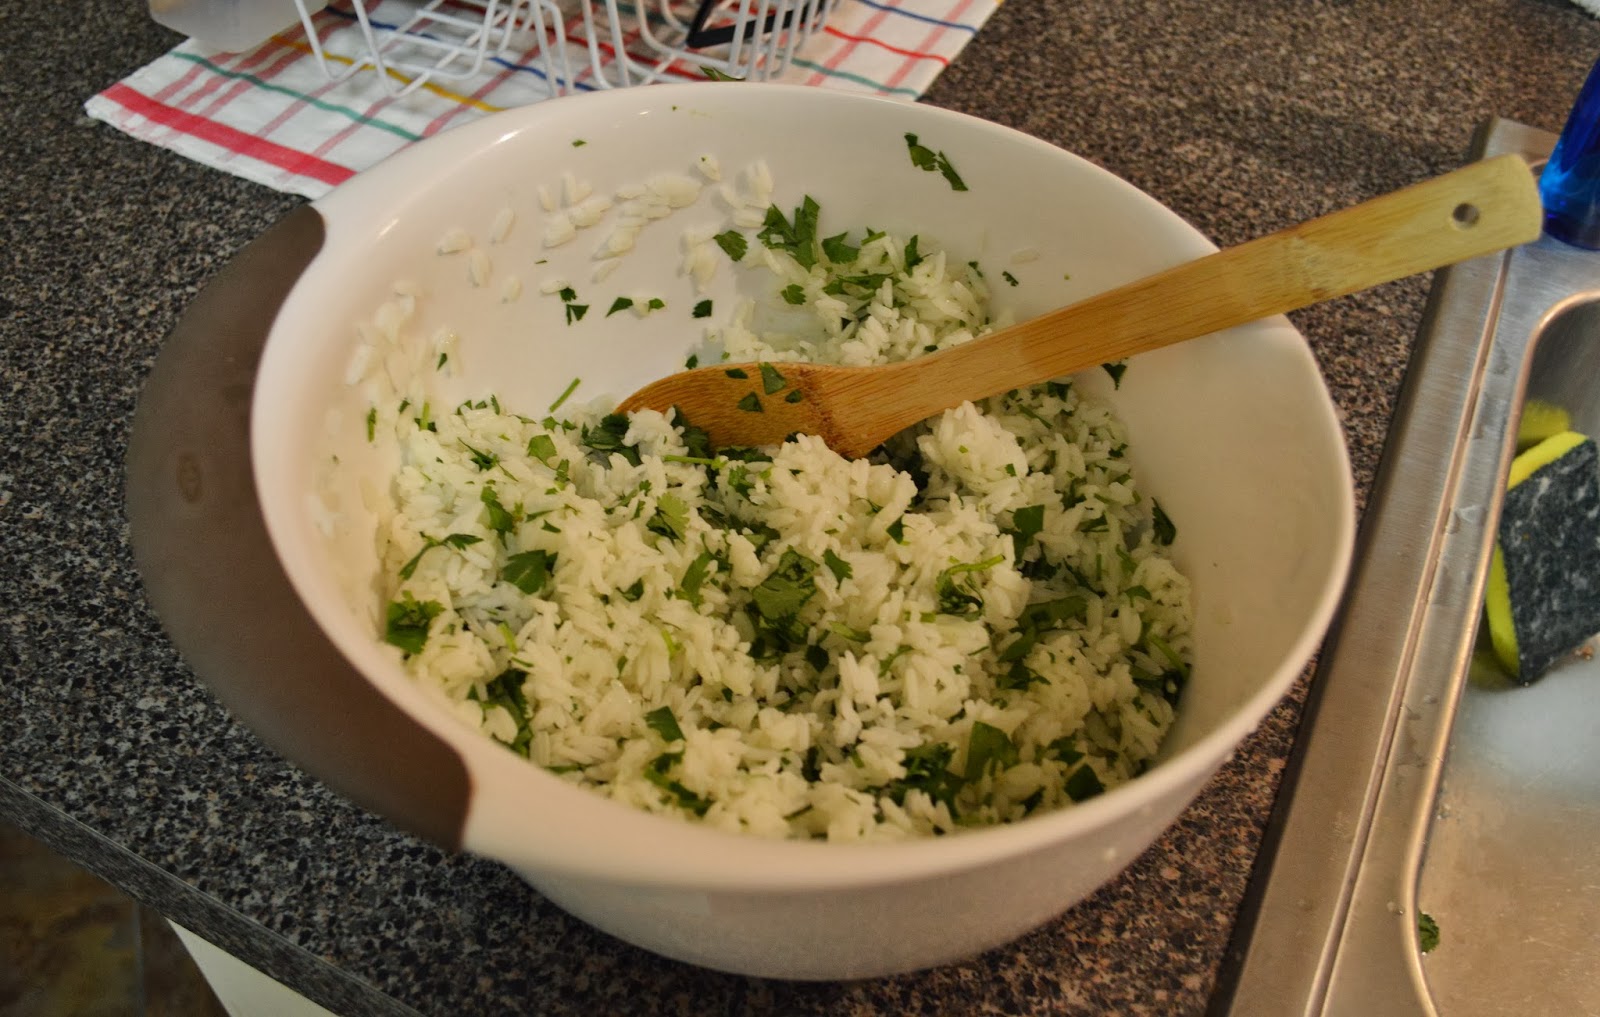
                      I then chopped up about half a "bunch" of cilantro and mixed it in to the cooked rice.


                      Lastly, mix in the lime juice!


                      Then serve!


                      Chipotle's Cilantro Lime Rice Copycat

                      Ingredients:
                      • 2 cups RICE (uncooked)
                      • 4 Tbs LIME JUICE
                      • 1/2 bunch CILANTRO (1/2 to 3/4 cup chopped)
                      Directions:
                      1. Start of by cooking the rice. (You will end up with about 6 cups of cooked rice). 
                      2. Chop up about half a "bunch" of cilantro and mix it in to the cooked rice.
                      3. Lastly, mix in the lime juice!
                      4. Then serve!